This is the realm of solar powered light displays. Light emitting diodes that sparkle and change, illuminating the art or sending messages. It is only occasionally the province of annoying little gags like the cricket, a device that chirps every few seconds, but only when the lights are out. Finding such a device in the dark is difficult, and they tend to have lives that end suddenly with a stomping and satisfying crunch underfoot.
We will start here by taking apart a typical solar garden light to see how it works. Then we can work on improving it, or making other changes to suit our needs.
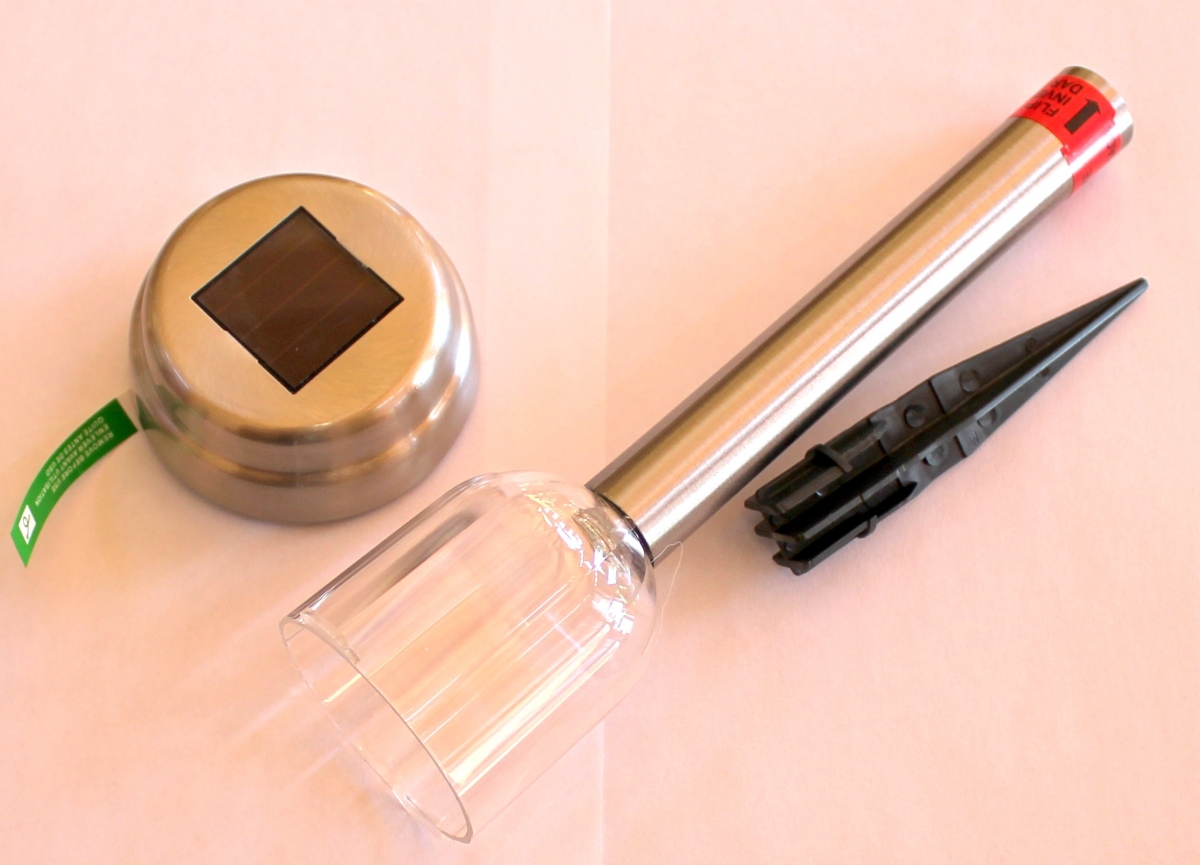
The part with the electronics in it is the top, where we can see the solar cell (on the left in the photo).
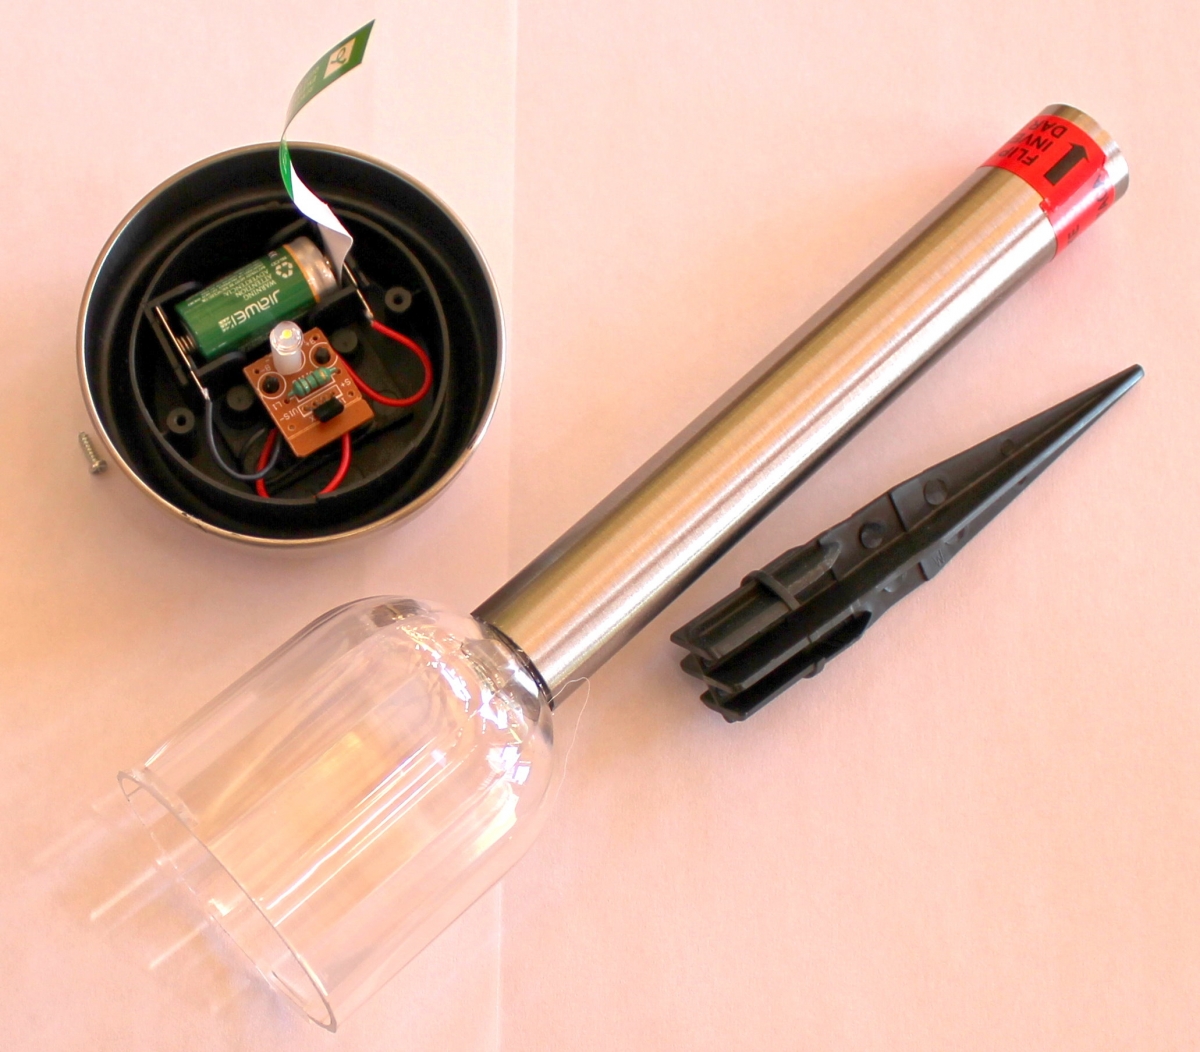
When we unscrew the battery cover on the underside of the electronics cap, we can see the battery and a small printed circuit board.
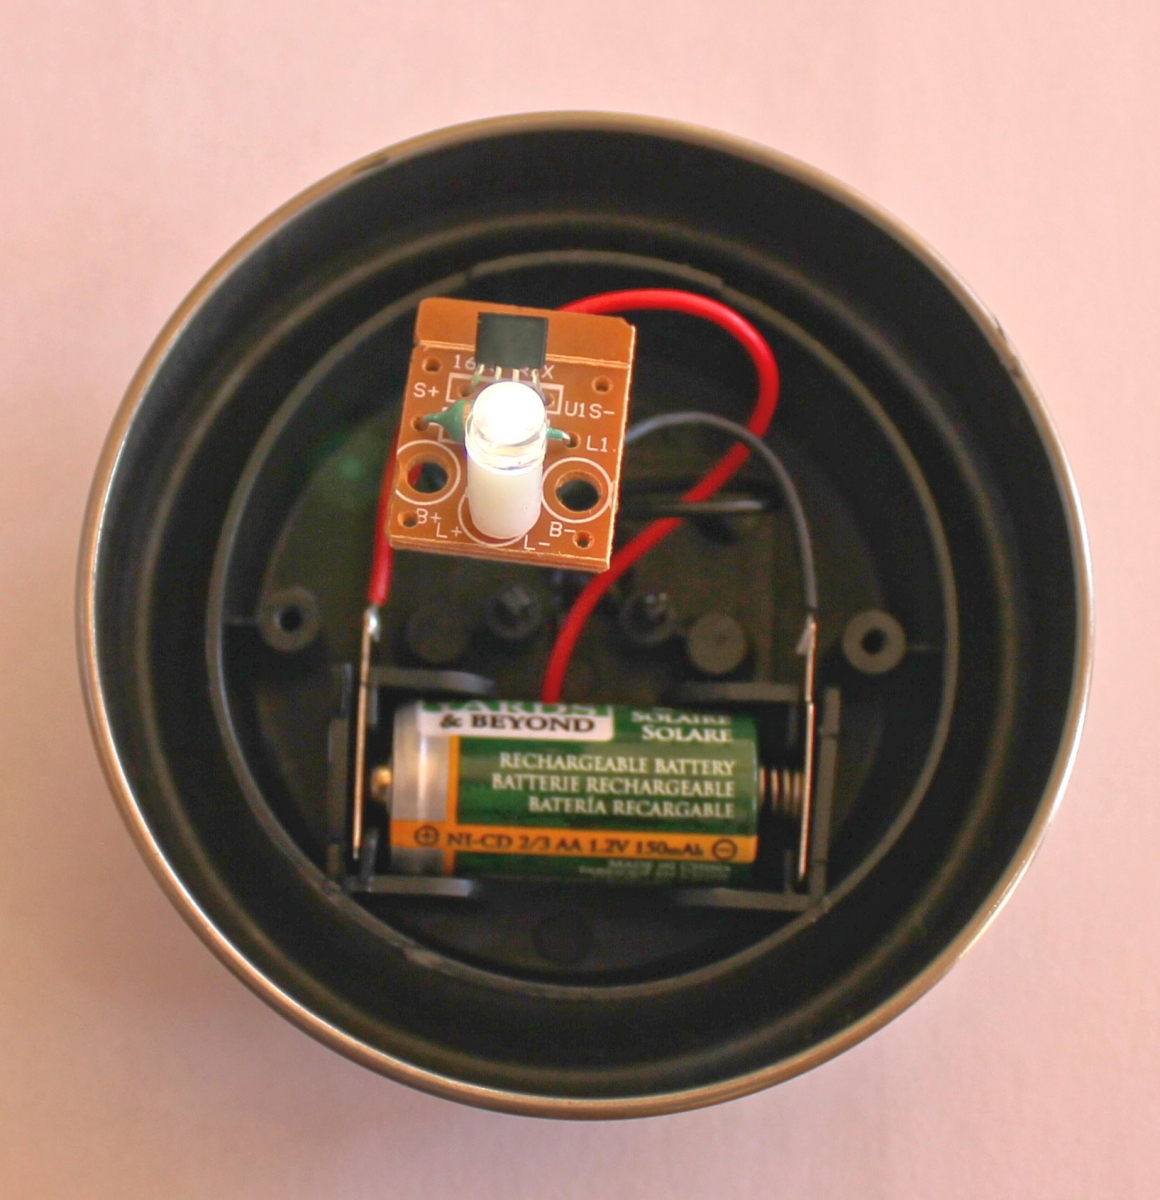
When we put the solar cell face down on the desk, the white LED turns on.
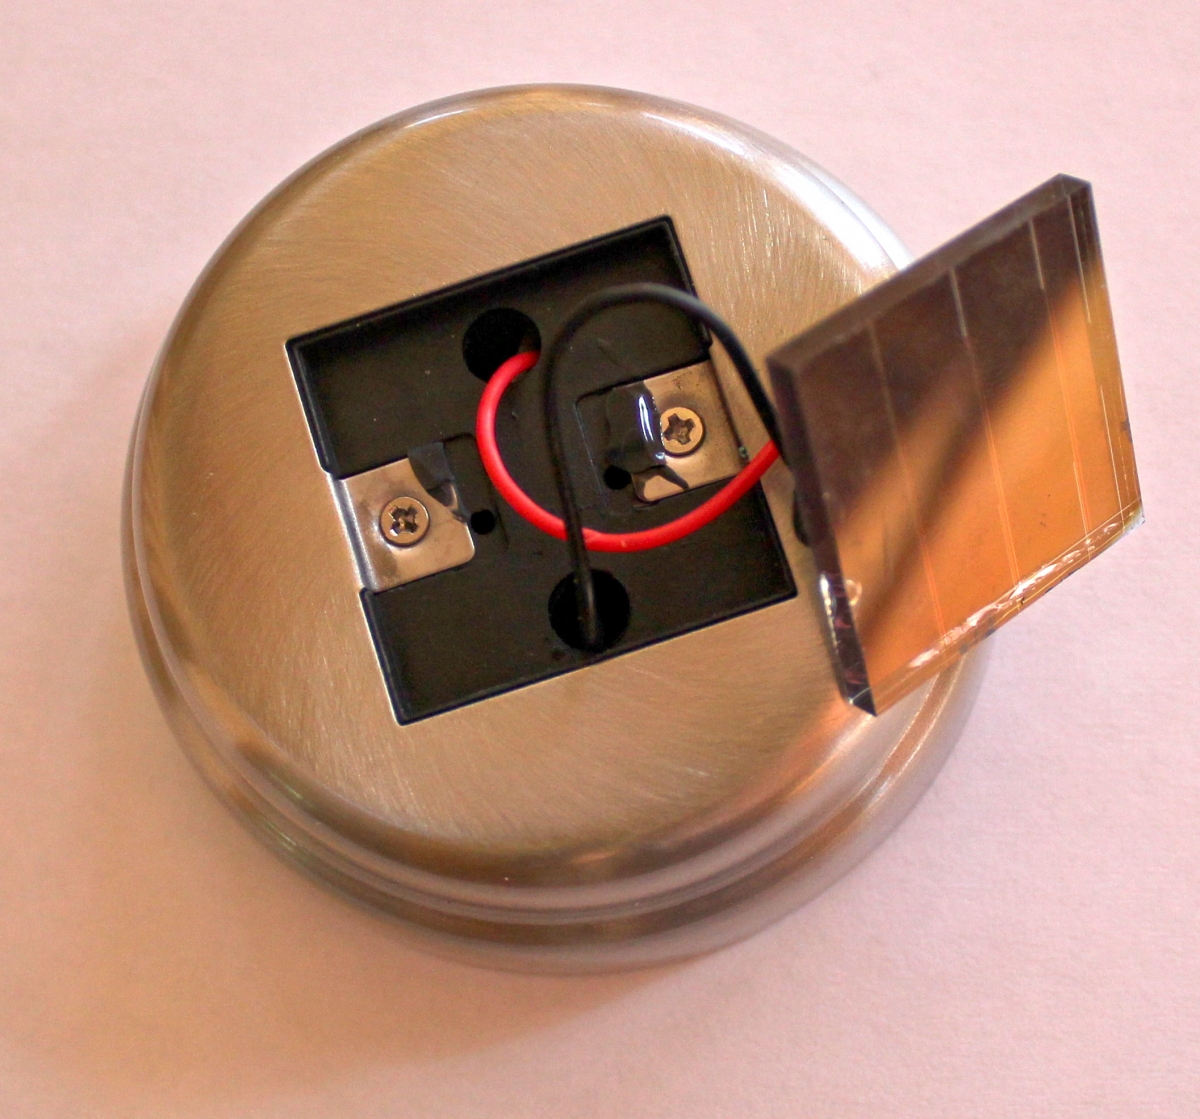
If you are very careful, you can use a small screw driver push the red and black wires through the glue holding the solar cell in place, and extract the solar cell. In this one, the glue was black silicone, and I had to gently remove what I could with a knife and some needle-nosed pliers. Other garden lights use hot-melt glue, which makes the job much easier. A few minutes of heating with a hair blow dryer and the glue melts, and we can push the wires through, letting the solar cell dangle from them, free of the glue.
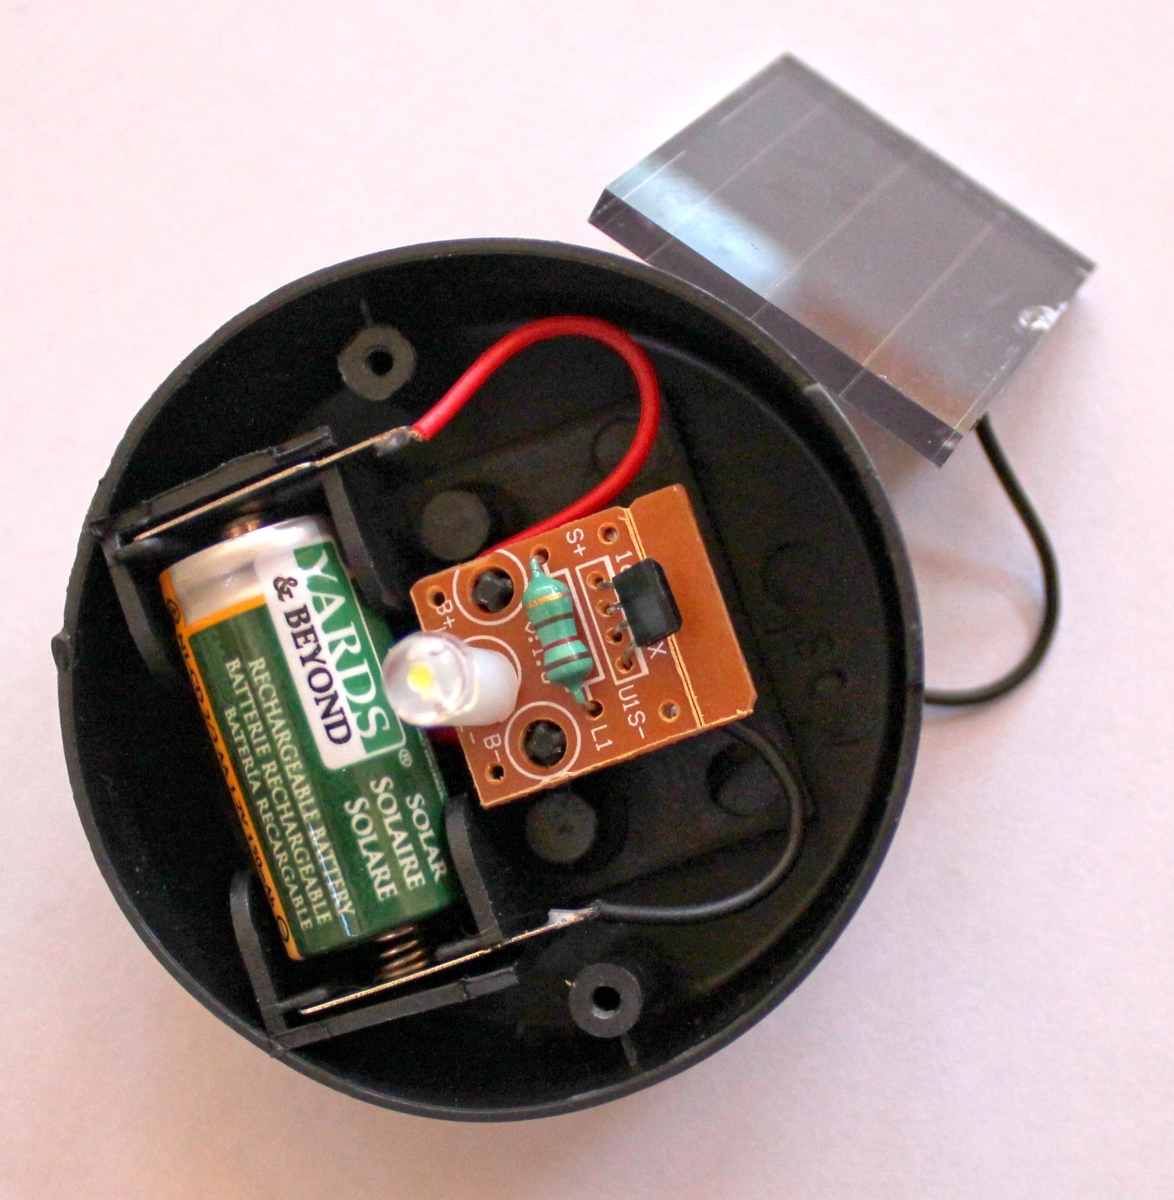
Now we can see what the device is made of. We have the solar cell, the 1.2 volt Nickel Metal Hydride rechargeable battery, the white LED, and the tiny little circuit board. The little board has only two components on it. There is an integrated circuit with four leads, and an inductor.
In direct sunlight, the little solar cell produced 2.52 volts. The white LED requires at least 3.1 volts to turn on. Worse, in the dark, the only power is from the battery, which can only supply 1.2 volts. And yet somehow the LED lights up. The secret is the integrated circuit and the inductor.
