
Counting in binary on the lights makes pretty patterns, but we can do more.
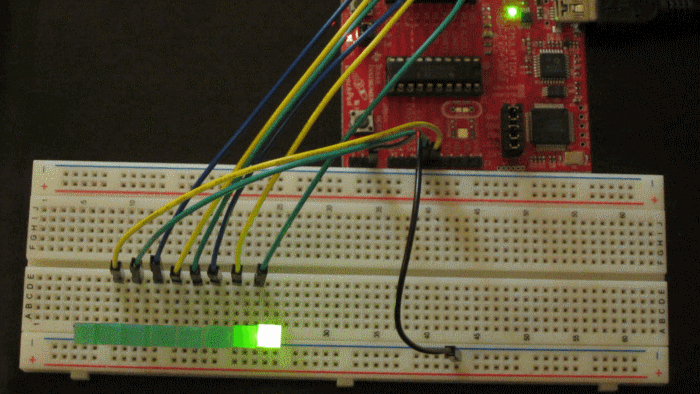
This program lights the LEDs one at a time, from right to left, and then starts over.
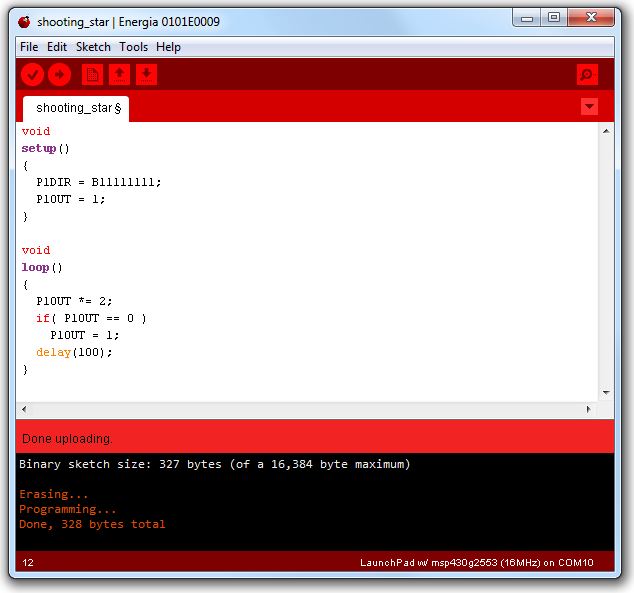
The line
P1OUT *= 2;
means 'multiply P1OUT by two'. If we do that eight times, the number will be 256, which is too big to fit in eight bits. All of the eight bits become zero when that happens. If P1OUT is zero, we set it to 1, so the pattern repeats. We only delay by a tenth of a second, so the light seems to shoot across the LEDs like a theater marquee.
In writing computer programs, there are usually many different ways to do the same thing. Here is the shooting star program, using some new concepts:
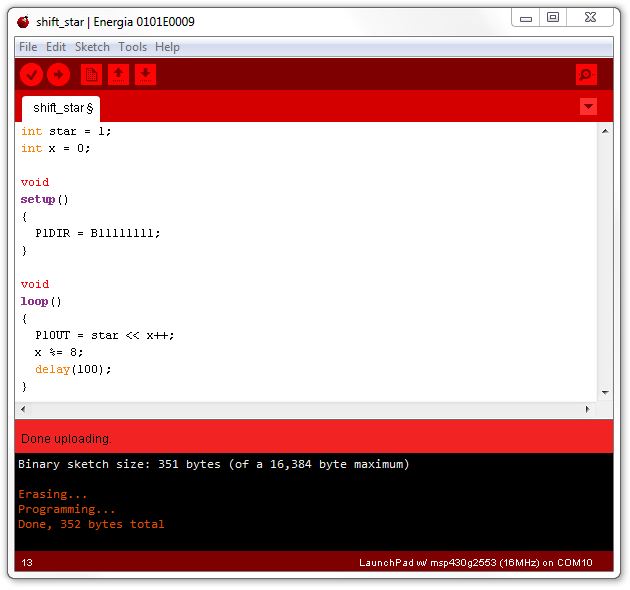
The first new concept is how to make up new variables. We have two integers declared at the top, star, and x. Star is the bit that will travel along the lights. X is a counter, which we will simply increment each time through the loop.
The next concept is shifting. We can shift all of the bits in a number left or right, using the << and >> operators. In this case, we are shifting the 1 bit to the left. That has the same effect as multiplying by two, if we only shift one bit at a time. But we can shift by a number (in this case, the number in the variable x). If we shift the 1 bit seven times, the light is now at the left end of the string of LEDs.
The last new concept is the modulo operator, the %= in the line x %= 8;. It gives us the remainder after dividing by something (in this case by 8). This is a tricky way of making sure that when x gets bigger than 7, it becomes 0 again. This is the 'clock arithmetic' you learned in fourth grade.
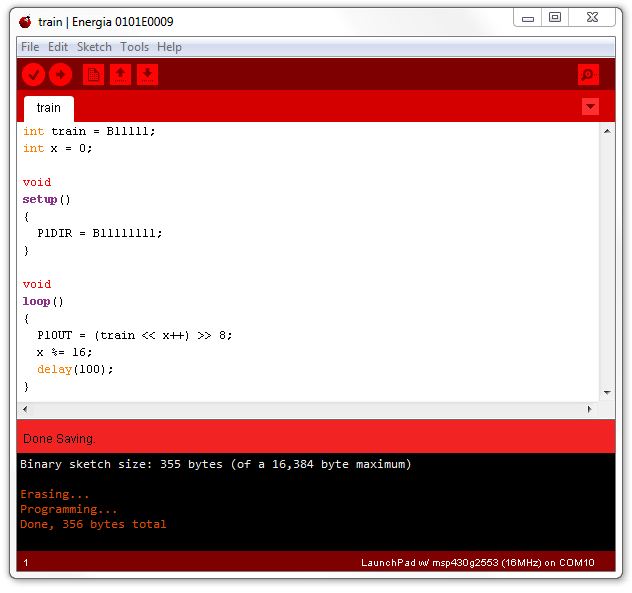
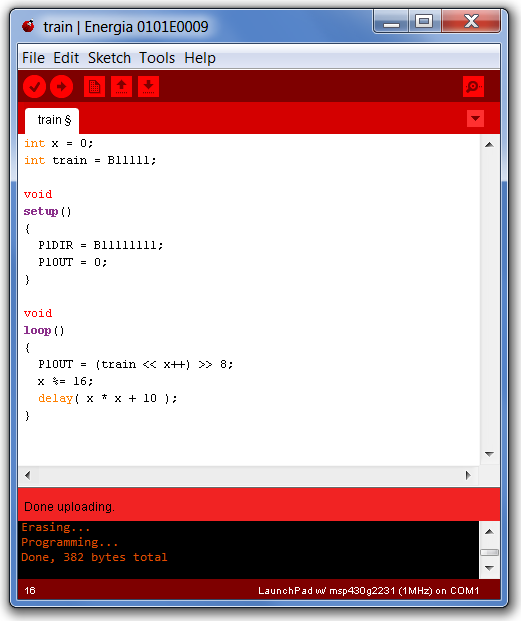
Now we can get tricky. How about a train of five lights moving right to left?
See if you can figure out how that program produces this pattern in the lights:

The tricky part is the line
P1OUT = (train << x++) >> 8;
Here we shift the train of 5 bits to the left by whatever number is in x (it will be between 0 and 15). Then we shift it to the right by 8, all in the same line.
We can make the train start out moving quickly and slow down as it gets to the end:
We can make the train go the other direction by changing one line:
P1OUT = (train << (16-x++)) >> 8;
We can also make a longer train by adding six bits from the second port, Port 2:
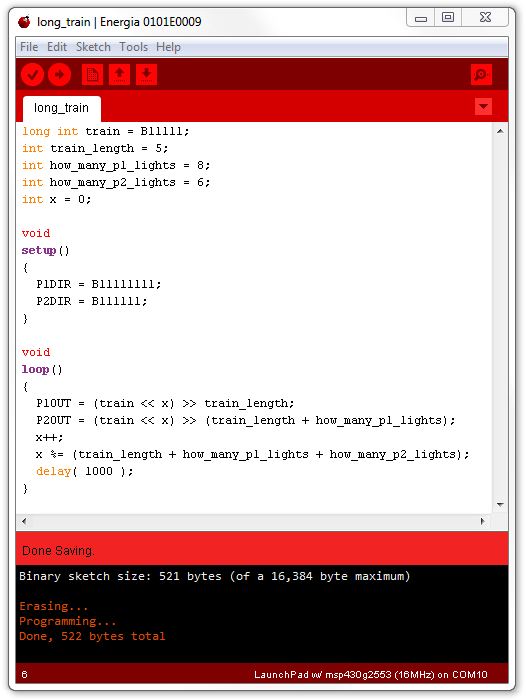
In the program above, we have replaced the constants with variables whose names tell us what the magic numbers represent. This is handy not only for reading the program, but for making changes easily if needed.
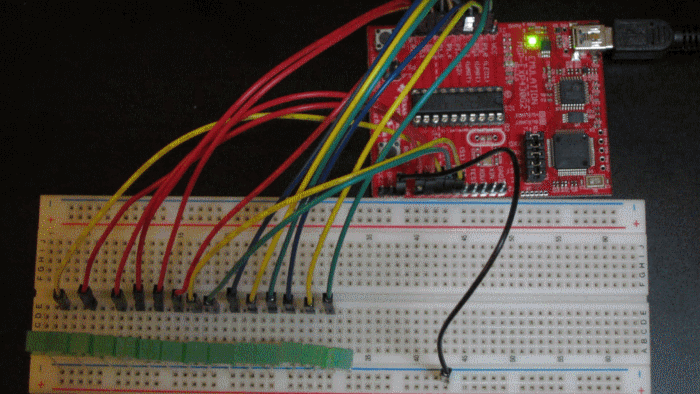
The photo above shows the long train (14 LEDs) and the connections to the second port on the Launchpad.
To make it easy to try these programs, here are links to their text so you can copy and paste them into Energia:
[To make these run on the Arduino, change P1DIR to DDRD and P1OUT to PORTD.]