
Try connecting a solar cell that produces 2 volts to a light emitting diode. It seems to work with red lights, but not with blue or white. Blue and white light emitting diodes need more than 2 volts to run.
Inside a solar garden light, we find a single 1.2 volt battery. How can this battery run a white light?
The answer is a clever circuit that uses a steady 1.2 volt source, and produces a series of spikes of higher voltage. These come at a rate so fast our eyes see it as continuous light.
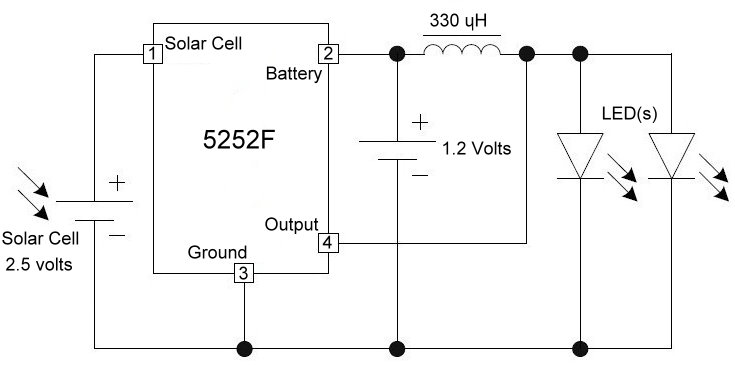 Above is the schematic for the Solar Garden Light, using the 5252F integrated circuit and a 330 microHenry inductor.
The integrated circuit does several things. It charges the 1.2 volt battery during the day, using power from the 2.5 volt solar cell. It detects when the solar cell is in the dark, and starts up the circuit inside that boosts the 1.2 volts from the battery to over 3 volts, and sends that to the LED.
We can control how much current goes to the LED by choosing different values for the inductor. 330 microHenrys will allow 8 milliamperes to go into the LED. This is fine for a single LED, but if we want to drive several LEDs, we can reduce the size of the inductor and get more current. 270 microHenrys will give us 10 milliamperes. 220 will give us 12 mA. 150 will give us 18 mA. 100 will give us 28 mA, which is more than we normally want in an LED, but probably won't hurt it too much. 47 microHenrys will give us 50 milliamperes, which would be suitable for three or four LEDs.
Now we have enough information to improve our solar garden light. One obvious improvement is to replace the solar cell with a larger one. This will provide more current to charge the battery, which will allow us to place the garden light where it might not get enough sun otherwise. If you can't find a larger solar cell, you can put two or several of the same size solar cells in parallel with one another, to get twice or several times the energy. Solar garden lights are often sold in sets, making this easy.
Another simple improvement is to replace the cheap battery with one that can store more energy. Our little solar light came with a tiny 1.2 volt nickel cadmium battery that can store 150 milliampere-hours of charge. We could replace it with a 300 milliampere-hour battery and get twice the energy storage capacity. But why stop there? 900 milliampere-hour batteries are made that still fit in an AA cell socket. Changing battery chemistry is another option. Using nickel metal hydride batteries instead of nickel cadmium allows us to get 1500 milliampere-hours into a single 1.2 volt AA cell. If we have a solar cell big enough to charge it, the light will stay on 10 times longer than our original garden light.
Once we have the larger solar cell and larger battery, we can change the inductor so that we can drive more LEDs. Rather than the light lasting 10 times as long, we can make it last twice as long, but drive 5 LEDs instead of one.
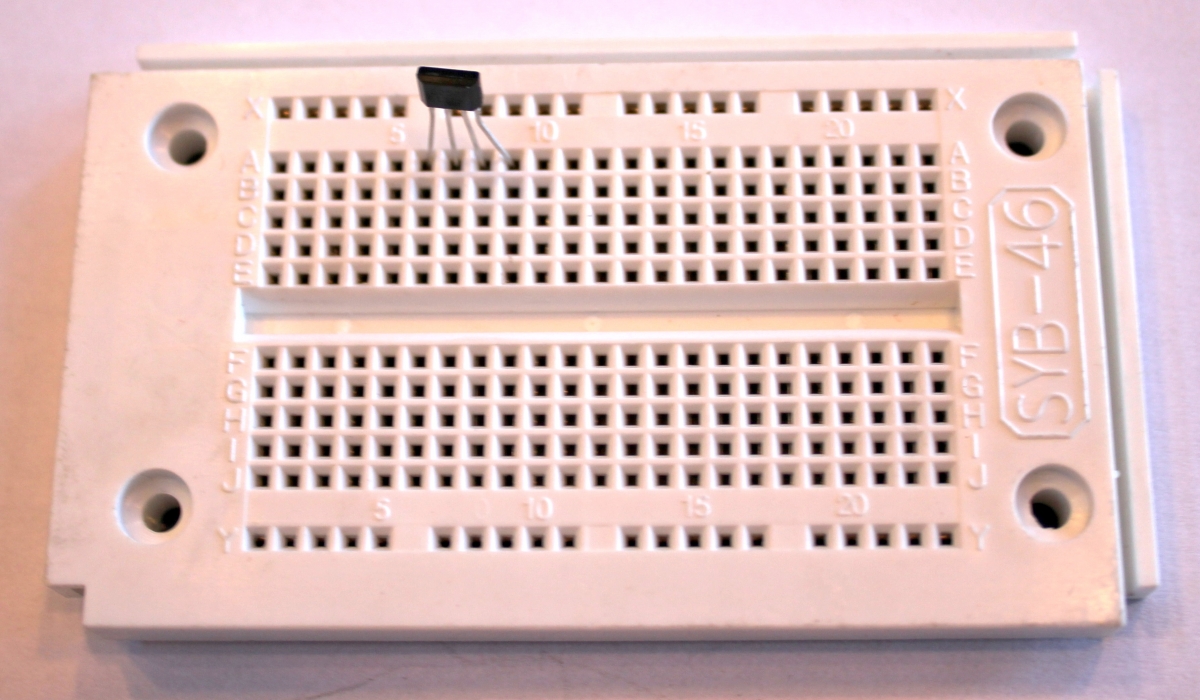
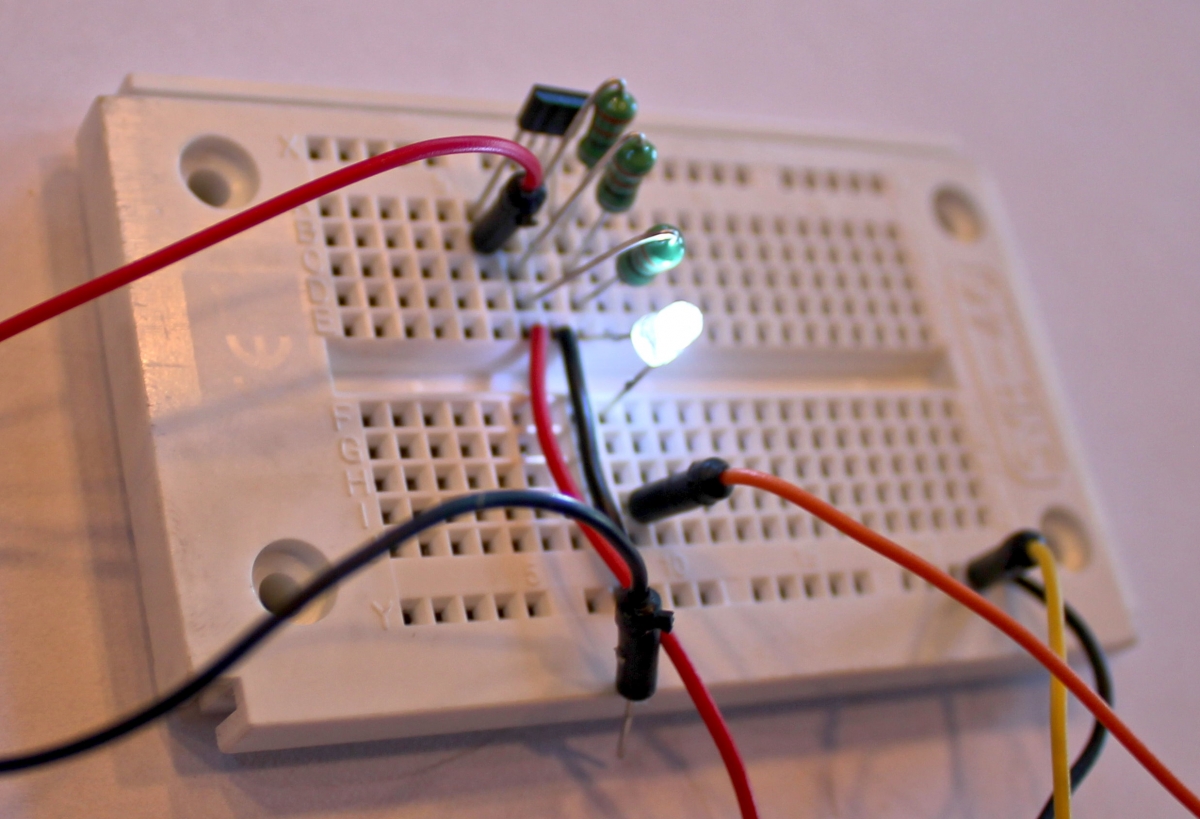
To build our own super garden light, we start by placing the 5252F integrated circuit into our solderless breadboard. The printed side of the 5252F is facing us in the photo.
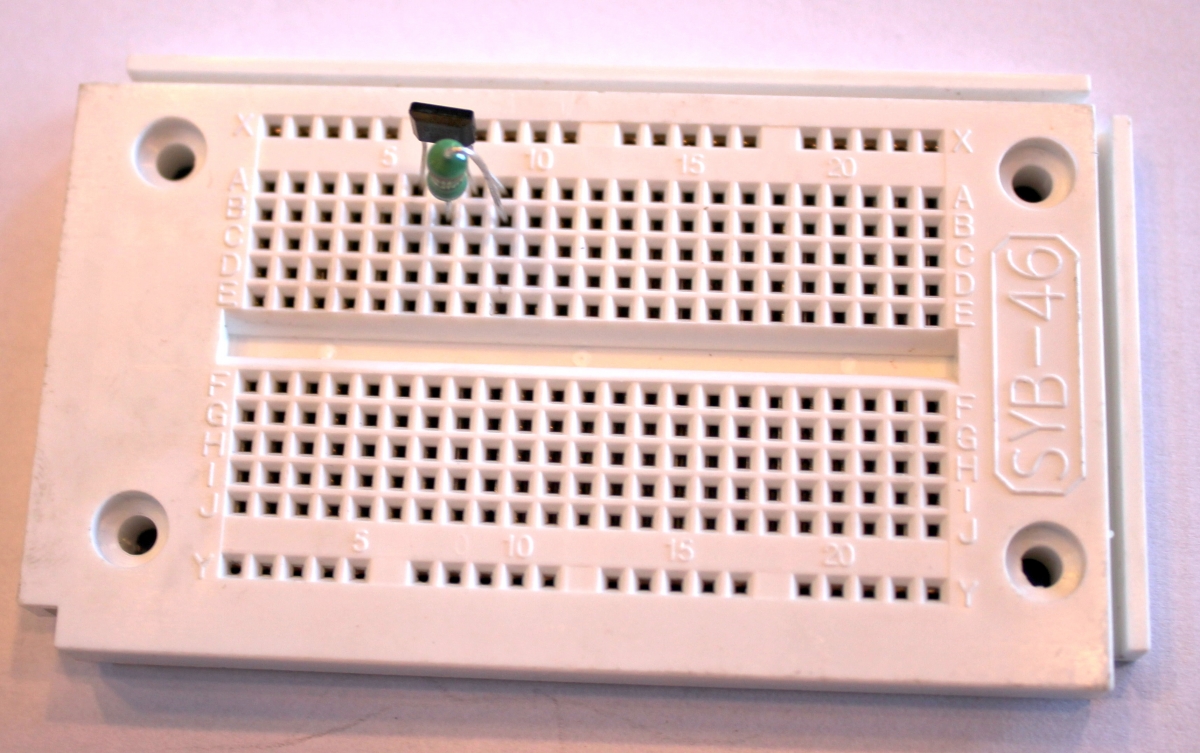
The 330 microHenry inductor comes next. We insert it into the same columns as pins 2 and 4 of the integrated circuit.
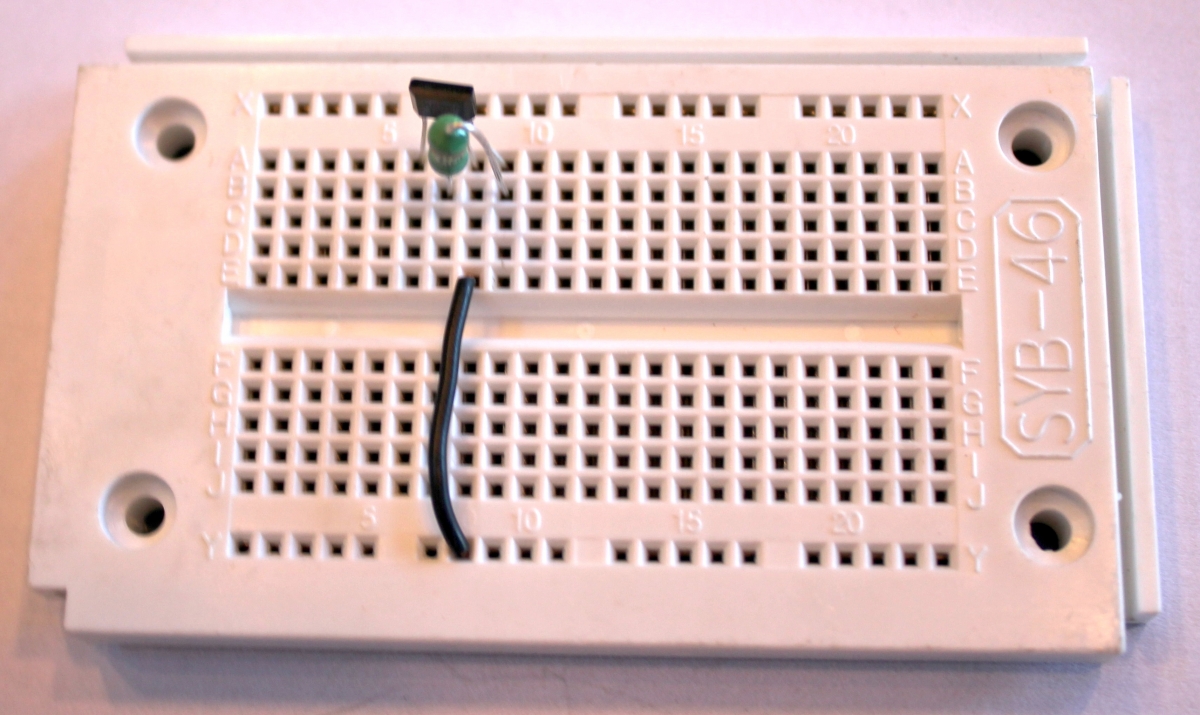
Next we use a wire to connect pin 3 of the integrated circuit to the bottom row, which we will use as ground.
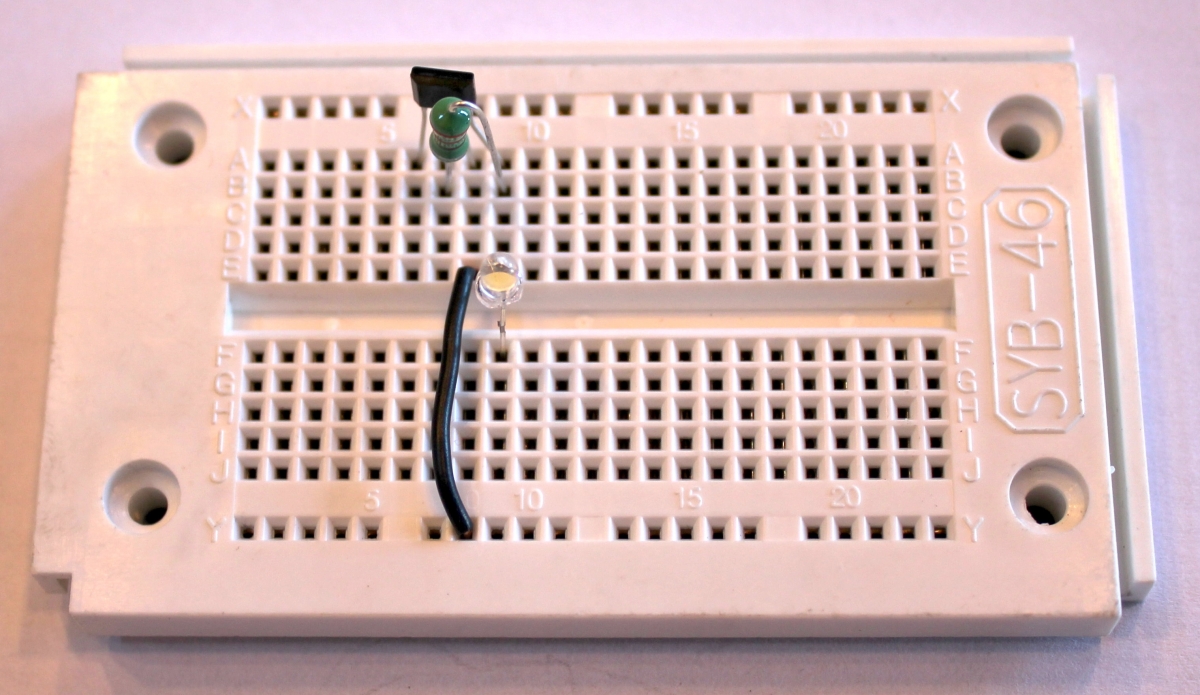
Now we add the white LED. The long leg (the anode, or positive end of the LED) is placed in the column where pin 4 of the 5252F and one end of the inductor are both placed. The short leg (the cathode, or negative end of the LED) straddles across the center to the column below.
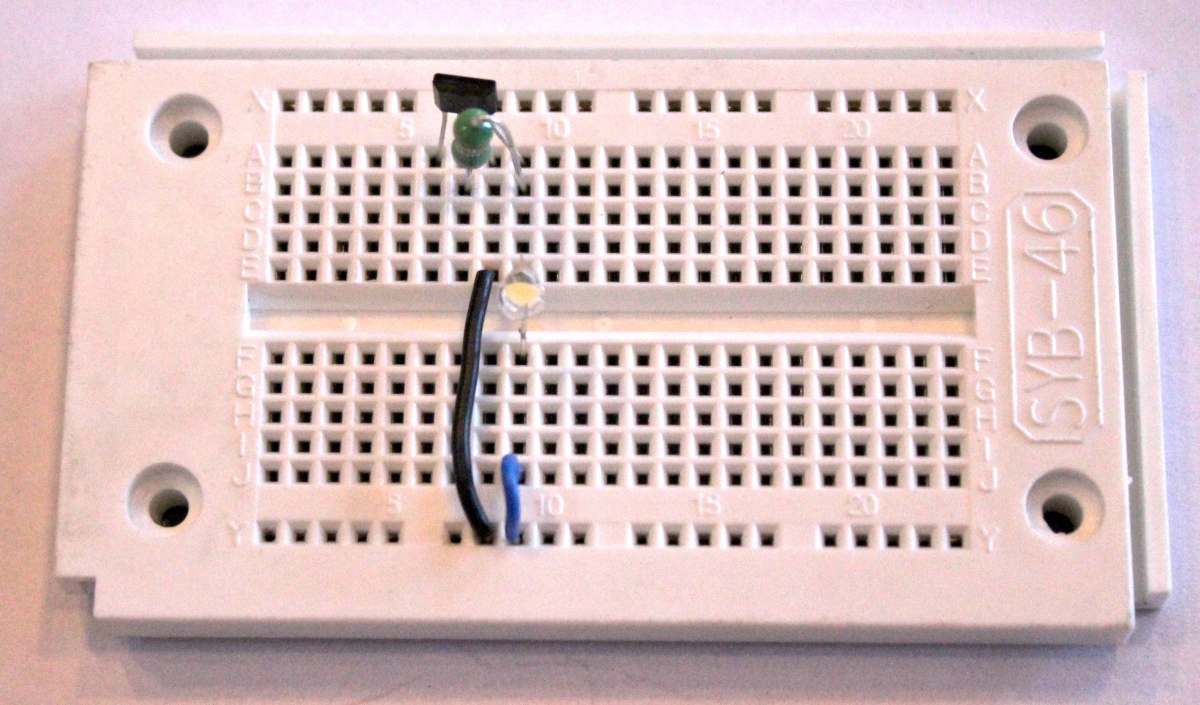
This allows us to connect the LED to ground using a short wire.
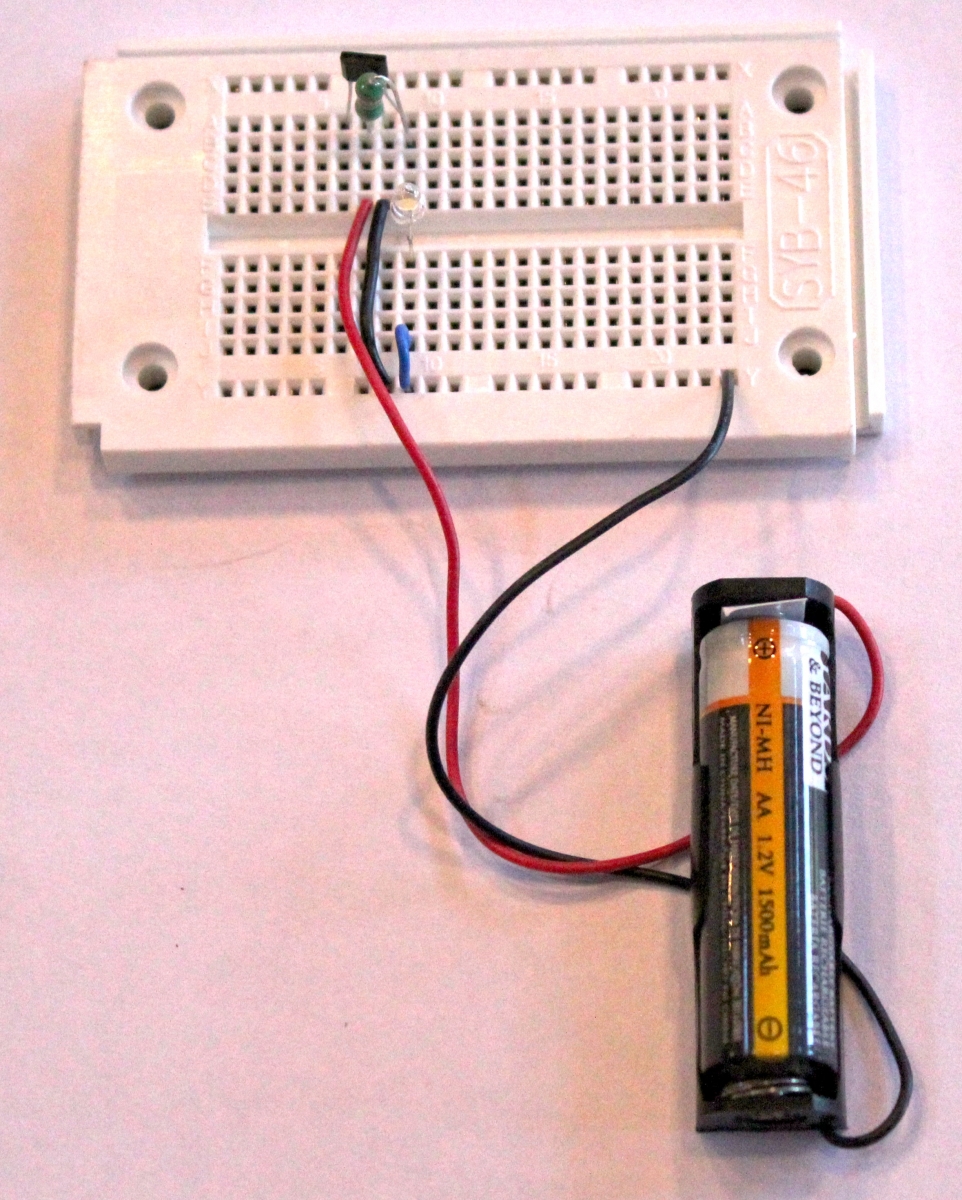
Now we connect the negative side of the battery (black wire) to ground, and the positive end (red wire) to the column that hold pin 2 of the 5252F.
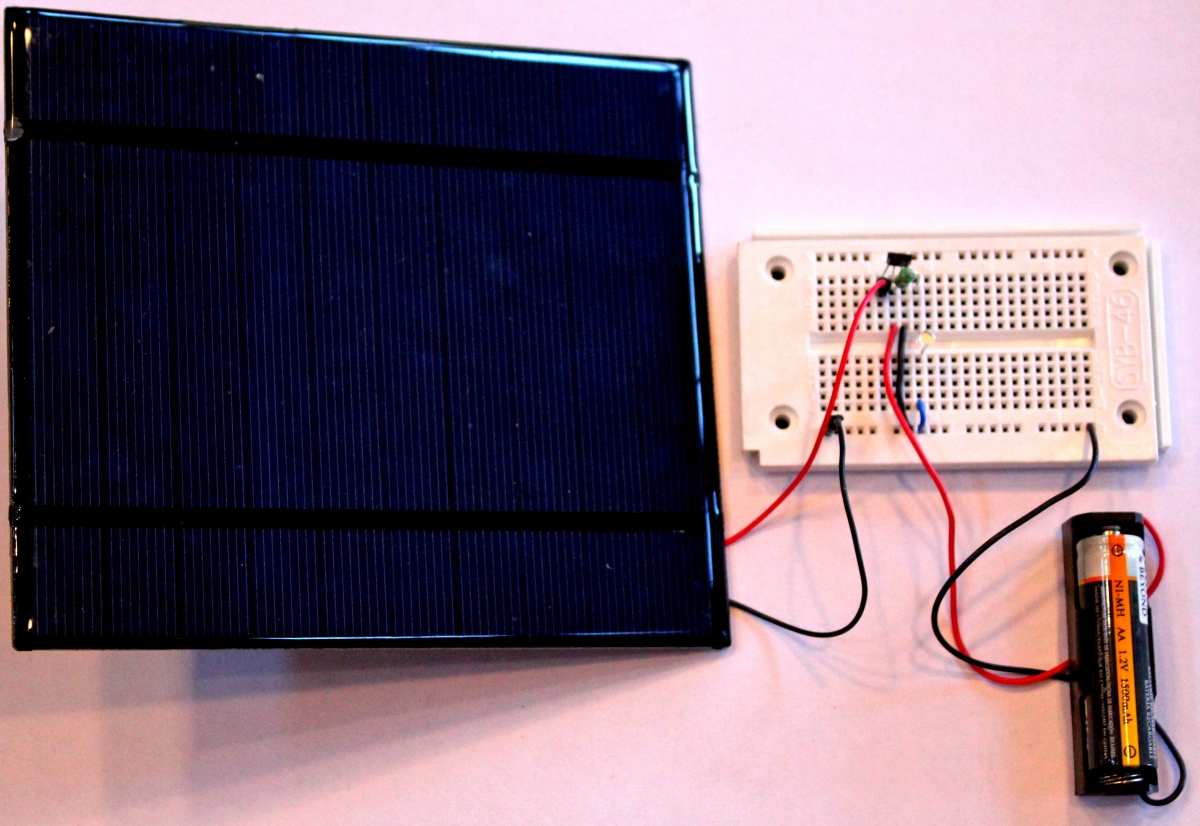
Lastly, we connect the solar cell to ground (black wire) and to pin 1 of the 5252F (red wire).
I went overboard with the size of my solar cell, because I planned to use it in the shade, instead of direct sunlight. But since I am using a 1500 milliampere-hour battery, I would have needed several of the small solar cells found in typical garden lights.
There is room on the breadboard to put two more inductors below the one we have. Inductors in parallel like that reduce the total inductance. This has the effect of increasing the current to the LED. The specifications for the 5252F say that 330 microHenrys should give us 8 milliamperes of current running through the LED. I measured 5.8 milliamperes with my meter, with the LED in place, which seems pretty close. With two inductors in parallel, I measured 10.9 milliamperes. With three inductors in parallel, I measured 14.5 milliamperes. As each inductor was added, I could see the LED get brighter.
 In the photo above, you can see the three inductors plugged into the same columns on the breadboard (so they are connected in parallel). You can also see that I simulated night-time by unplugging the black wire from the solar cell, so the 5252F sees no voltage there, and concludes it is too dark for the cell to produce electricity.