
The photo below shows an inexpensive Arduino Nano set up to be solar powered.
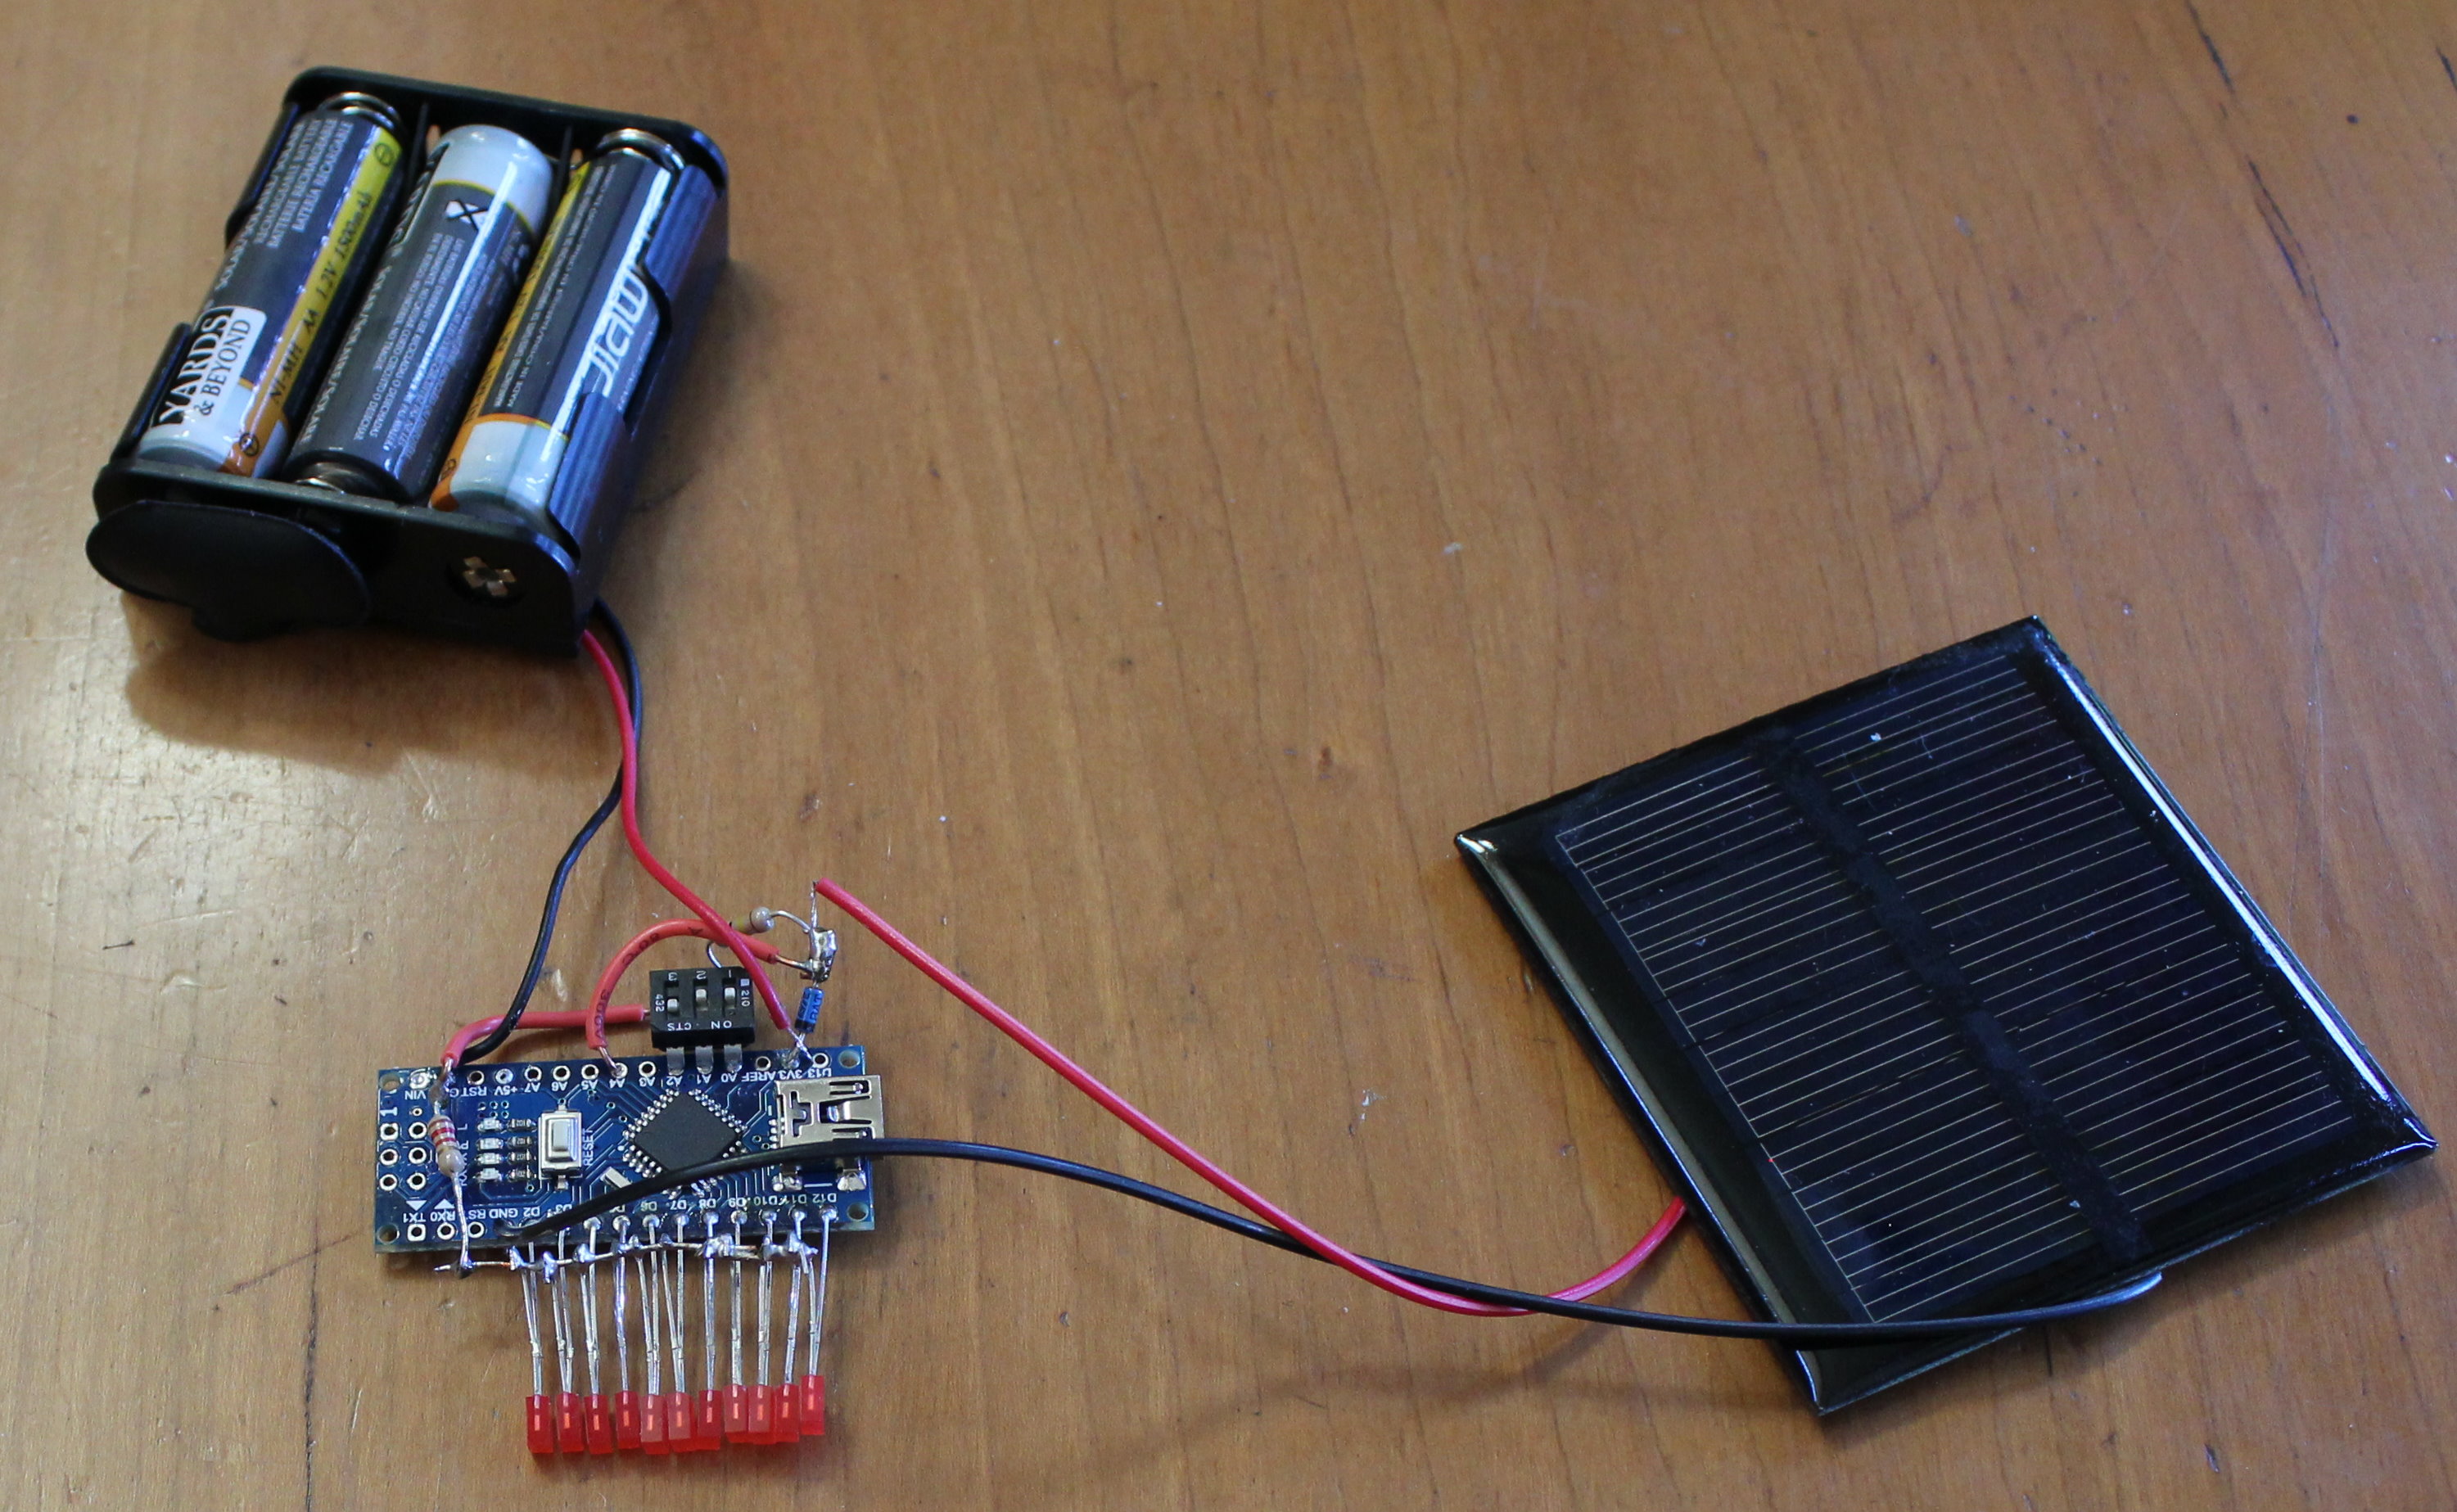
The solar panel is connected to the 3.3 volt pin of the Arduino through a diode. The batteries are connected directly to the 3.3 volt pin. This allows the solar cell to charge the batteries during the day, and the diode prevents the batteries from draining through the solar panel at night.
Connected to pins A0, A1, and A2 is a 3 position DIP switch that allows the user to select one of eight different demonstration programs to run. The pins on the other side of the switch are all connected to ground, and to a 10,000 ohm pull-up resistor that is connected to the solar panel.
The A4 pin is also connected at that spot. This allows the computer to tell if the solar panel is generating voltage. The software can then go to sleep, so the solar panel can charge the battery faster. When night comes, the program wakes up, and starts making patterns on the LED lights that are attached to pins D2 through D12.
The program running on the computer can be seen here.
Nice as it is, the little Arduino is not the best choice for a solar powered computer. Because the little board has several chips soldered onto it to do things like USB communication and manage the power, and because it has an LED soldered on to indicate it is getting power, the little computer uses up almost 55 milliamperes of current even when it is asleep and not doing anything.
Our solar panel produces 90 milliamperes when lying horizontally in the full sun. It needs to run the computer and charge the batteries. If the computer is using up 55 miiliamps, that leaves only 35 milliamps to charge the batteries. Assuming six hours of sunlight per day, we get 210 milliampere-hours of charge. That can run the computer for less than 4 hours.
You can get around this by using the computer chip by itself (after you program it), but in the Arduino Nano, the computer chip is soldered in, and not removable. But even if it were removable (as it is in some of the larger more expensive Arduinos), it is not as good at running on batteries or solar power as the Texas Instruments MSP430 chip.
 The photo above looks a little like a rat's nest, but most of the wires are just to connect the computer to the LEDs, and that is very straightforward. As with the Arduino, the solar panel is connected to the 3.3 volt pin of the chip through a diode. The battery, as before, is connected directly to the 3.3 volt power pin of the MSP430 chip.
This version of the demo program has a servo motor demo mode. The servo motor is powered by the battery pack on the right, which in the finished project would have its own solar panel and diode.
As before, we have three switches to select which demo to run. And we use the P2_7 pin to sense whether the sun is providing power. If it is, we sleep in low power mode to charge the batteries faster.
Using the MSP430 chip, the demo program uses less than six milliamperes to run. That leaves us 84 milliamperes to charge the battery. In six hours of sunlight, we get 504 milliampere-hours of power. That will last us 84 hours -- not only all night, but three and a half days in the dark.