
Adding LED lighting to small art pieces can transform them.
A nest of hollowed-out chicken eggs can make one statement by day,

...and get an entirely different look at night.

If you want to make your own, carefully make a hole in the side of the egg (not one of the ends) a little larger than the LED you will be inserting. About an inch from that, make a smaller hole to allow air to come in as you suck the contents out of the egg. A little washing, and you can insert the LED (a high brightness white one in this case) inside. Add a current limiting resistor, and a battery, and you are all done. I used sandpaper to rough up the clear surface of the LEDs to make them diffused, since most super-high brightness LEDs are water clear.
Our first project, however, is Electric Flowers.
We will hide bright colored LEDs inside origami flowers, and arrange them in a vase made from a recycled bottle.
First, we select a power supply. We don't want to be constantly changing batteries, so we use a 9 volt plug-in power supply from an old toy. These are often referred to as "wall warts", since the transformer and other electronics that reduce the wall socket power down to (in this case) 9 volts are hidden in a plastic shell that plugs into the wall.
The LEDs we are using have a forward voltage drop of 3.6 volts. So the voltage we need for our current calculations is (9 volts - 3.6 volts) = 5.4 volts.
These LEDs are rather robust, and can handle 200 milliamperes of current, glowing quite brightly when they do. They will eventually die after a few hours, but for a short time they can handle the high current. If you want a more lasting bouquet, use more resistance (limit the current to 30 milliamps per LED) and simply use more LEDs if you want more light.
5.4 volts divided by 200 milliamps is 27 ohms, so that is what we select as our current limiting resistor.
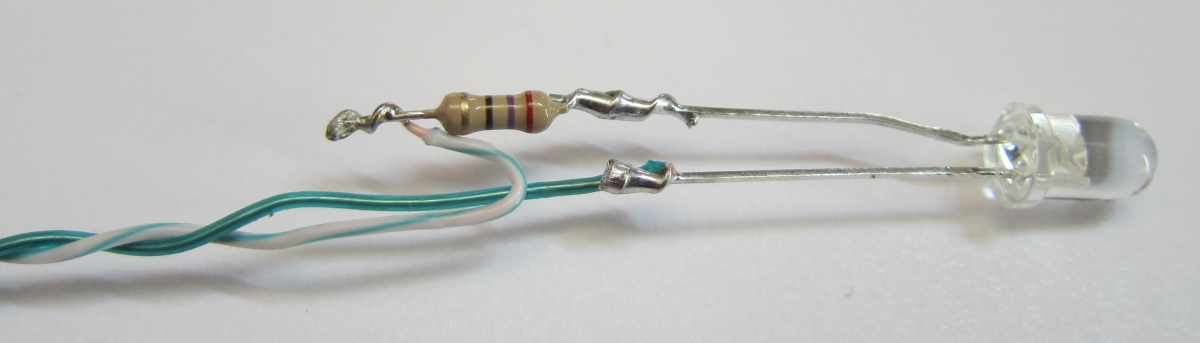
We solder the resistor to one lead of the LED (either lead will do, it doesn't matter which). We solder a couple of wire leads to the LED and the resistor to act as the stem of our flower. I used the green pair from a short length of CAT5 network wire, because I happen to have lots of that around. Any insulated wire will do, but it should look nice.
I had earlier made some origami flowers out of plain white paper. There are a huge number of origami flower instructions, for making hundreds of different types of flowers, on many Internet web sites, so I won't repeat those instructions here. But select a deep flower type that can hide the LED easily.

We cut the bottom of the flower off, so there is a small hole, just big enough for the wires, but not the LED, to fit through. Push the wires through, and pull until the LED fits snugly inside the flower. Use some transparent tape to hold it in place. We then cut about an inch and a half length of plastic straw to pull up over the wire ends, to hide the connection.

Above you can see a blue one from a couple different angles, and in the dark. It is powered by a nine volt battery for testing.
To complete the project, we drill a hole in the bottle near the bottom, so the wires from the wall wart power supply can be threaded through. We then solder all of the flower wires to the power supply in parallel, making sure they all light up, and no wires are swapped. We insulate the soldered connections with a little electrical tape, and pull the wires down into the bottle to hide them. The flowers droop over the bottle to illuminate the table under them, like little night lights. You can see the pool of red light under the flower on the right even in the daytime. The other flowers are bell shaped, and hide more of their light inside.

At night, the flowers glow.
