
Our smallest dog, Nano, loves to chase her laser dot. Our cat Tarzan also loves the game. But we tire of it before they do. Arduino to the rescue!
We built an automated laser cat/dog toy, and they love it.
We start with a pair of small servo motors:
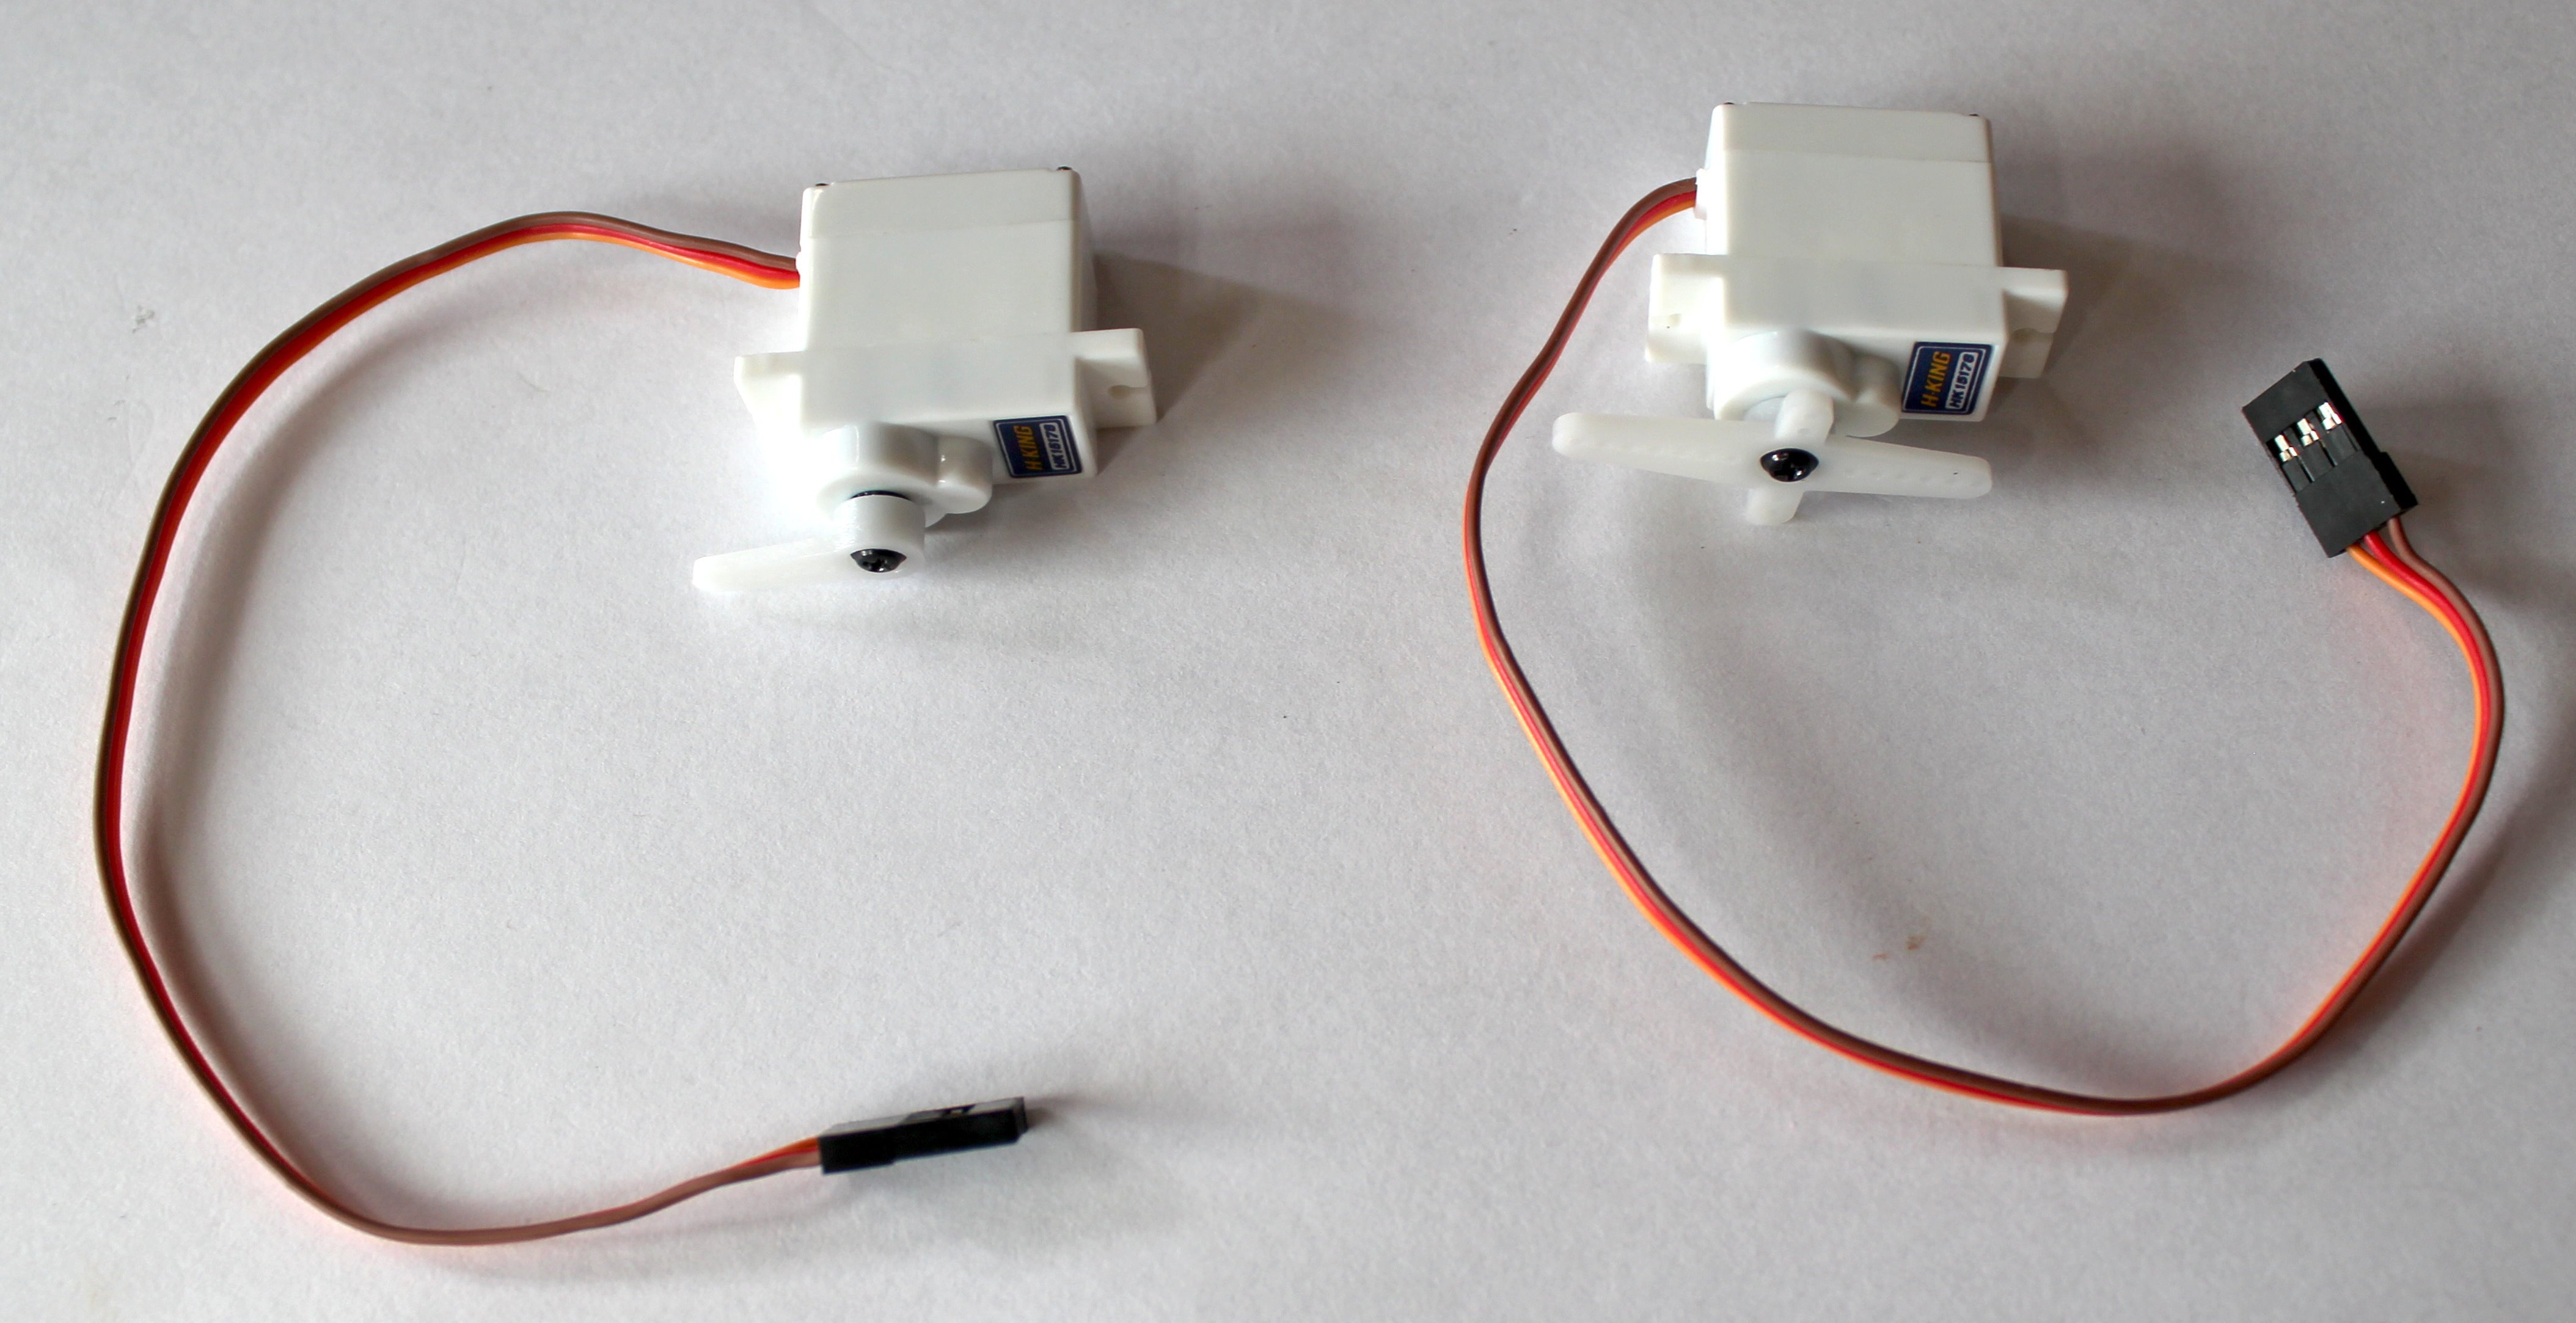
The servos come with an assortment of "feet" which we can attach to the rotor. We attached the largest foot to the servo on the right, which will move the laser left and right. That foot will be glued to a surface that the whole device will stand on. We attached a smaller foot to the servo on the left. That foot will have the laser glued to it, and will move the laser dot up and down.
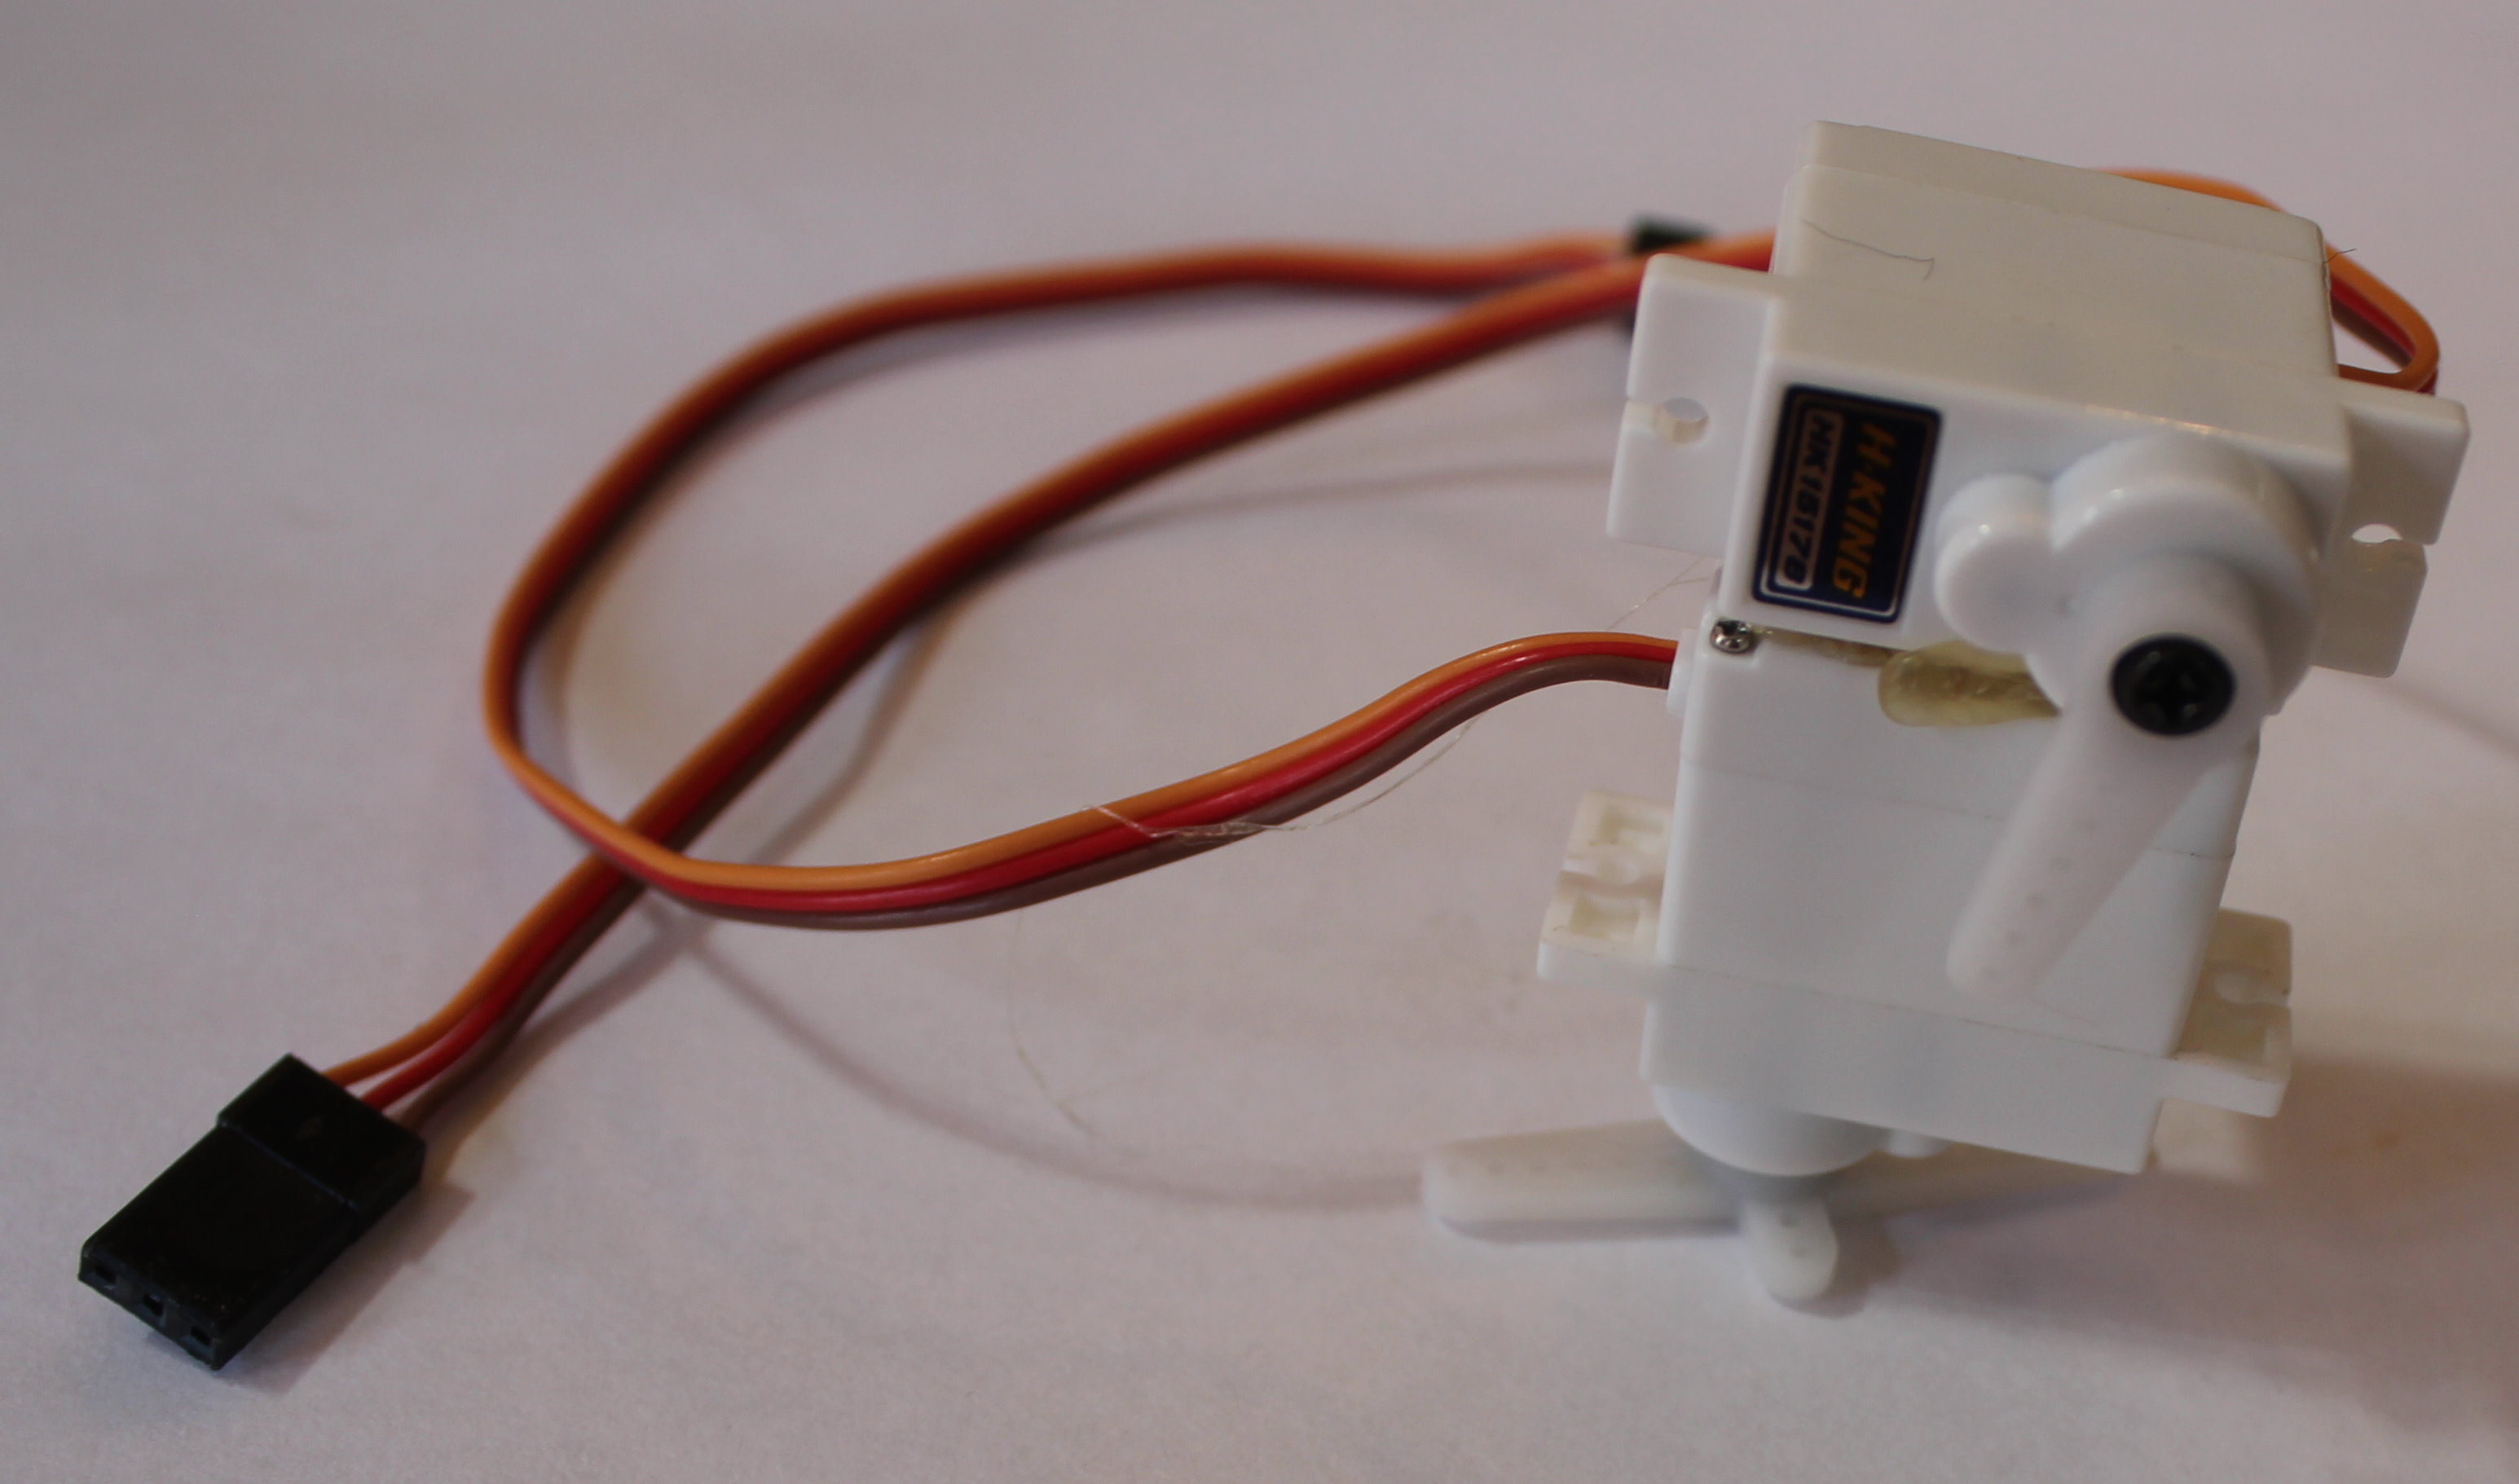
Next, we glue the servos together, so that the bottom one can swivel left and right, and the top one can move the laser up and down.
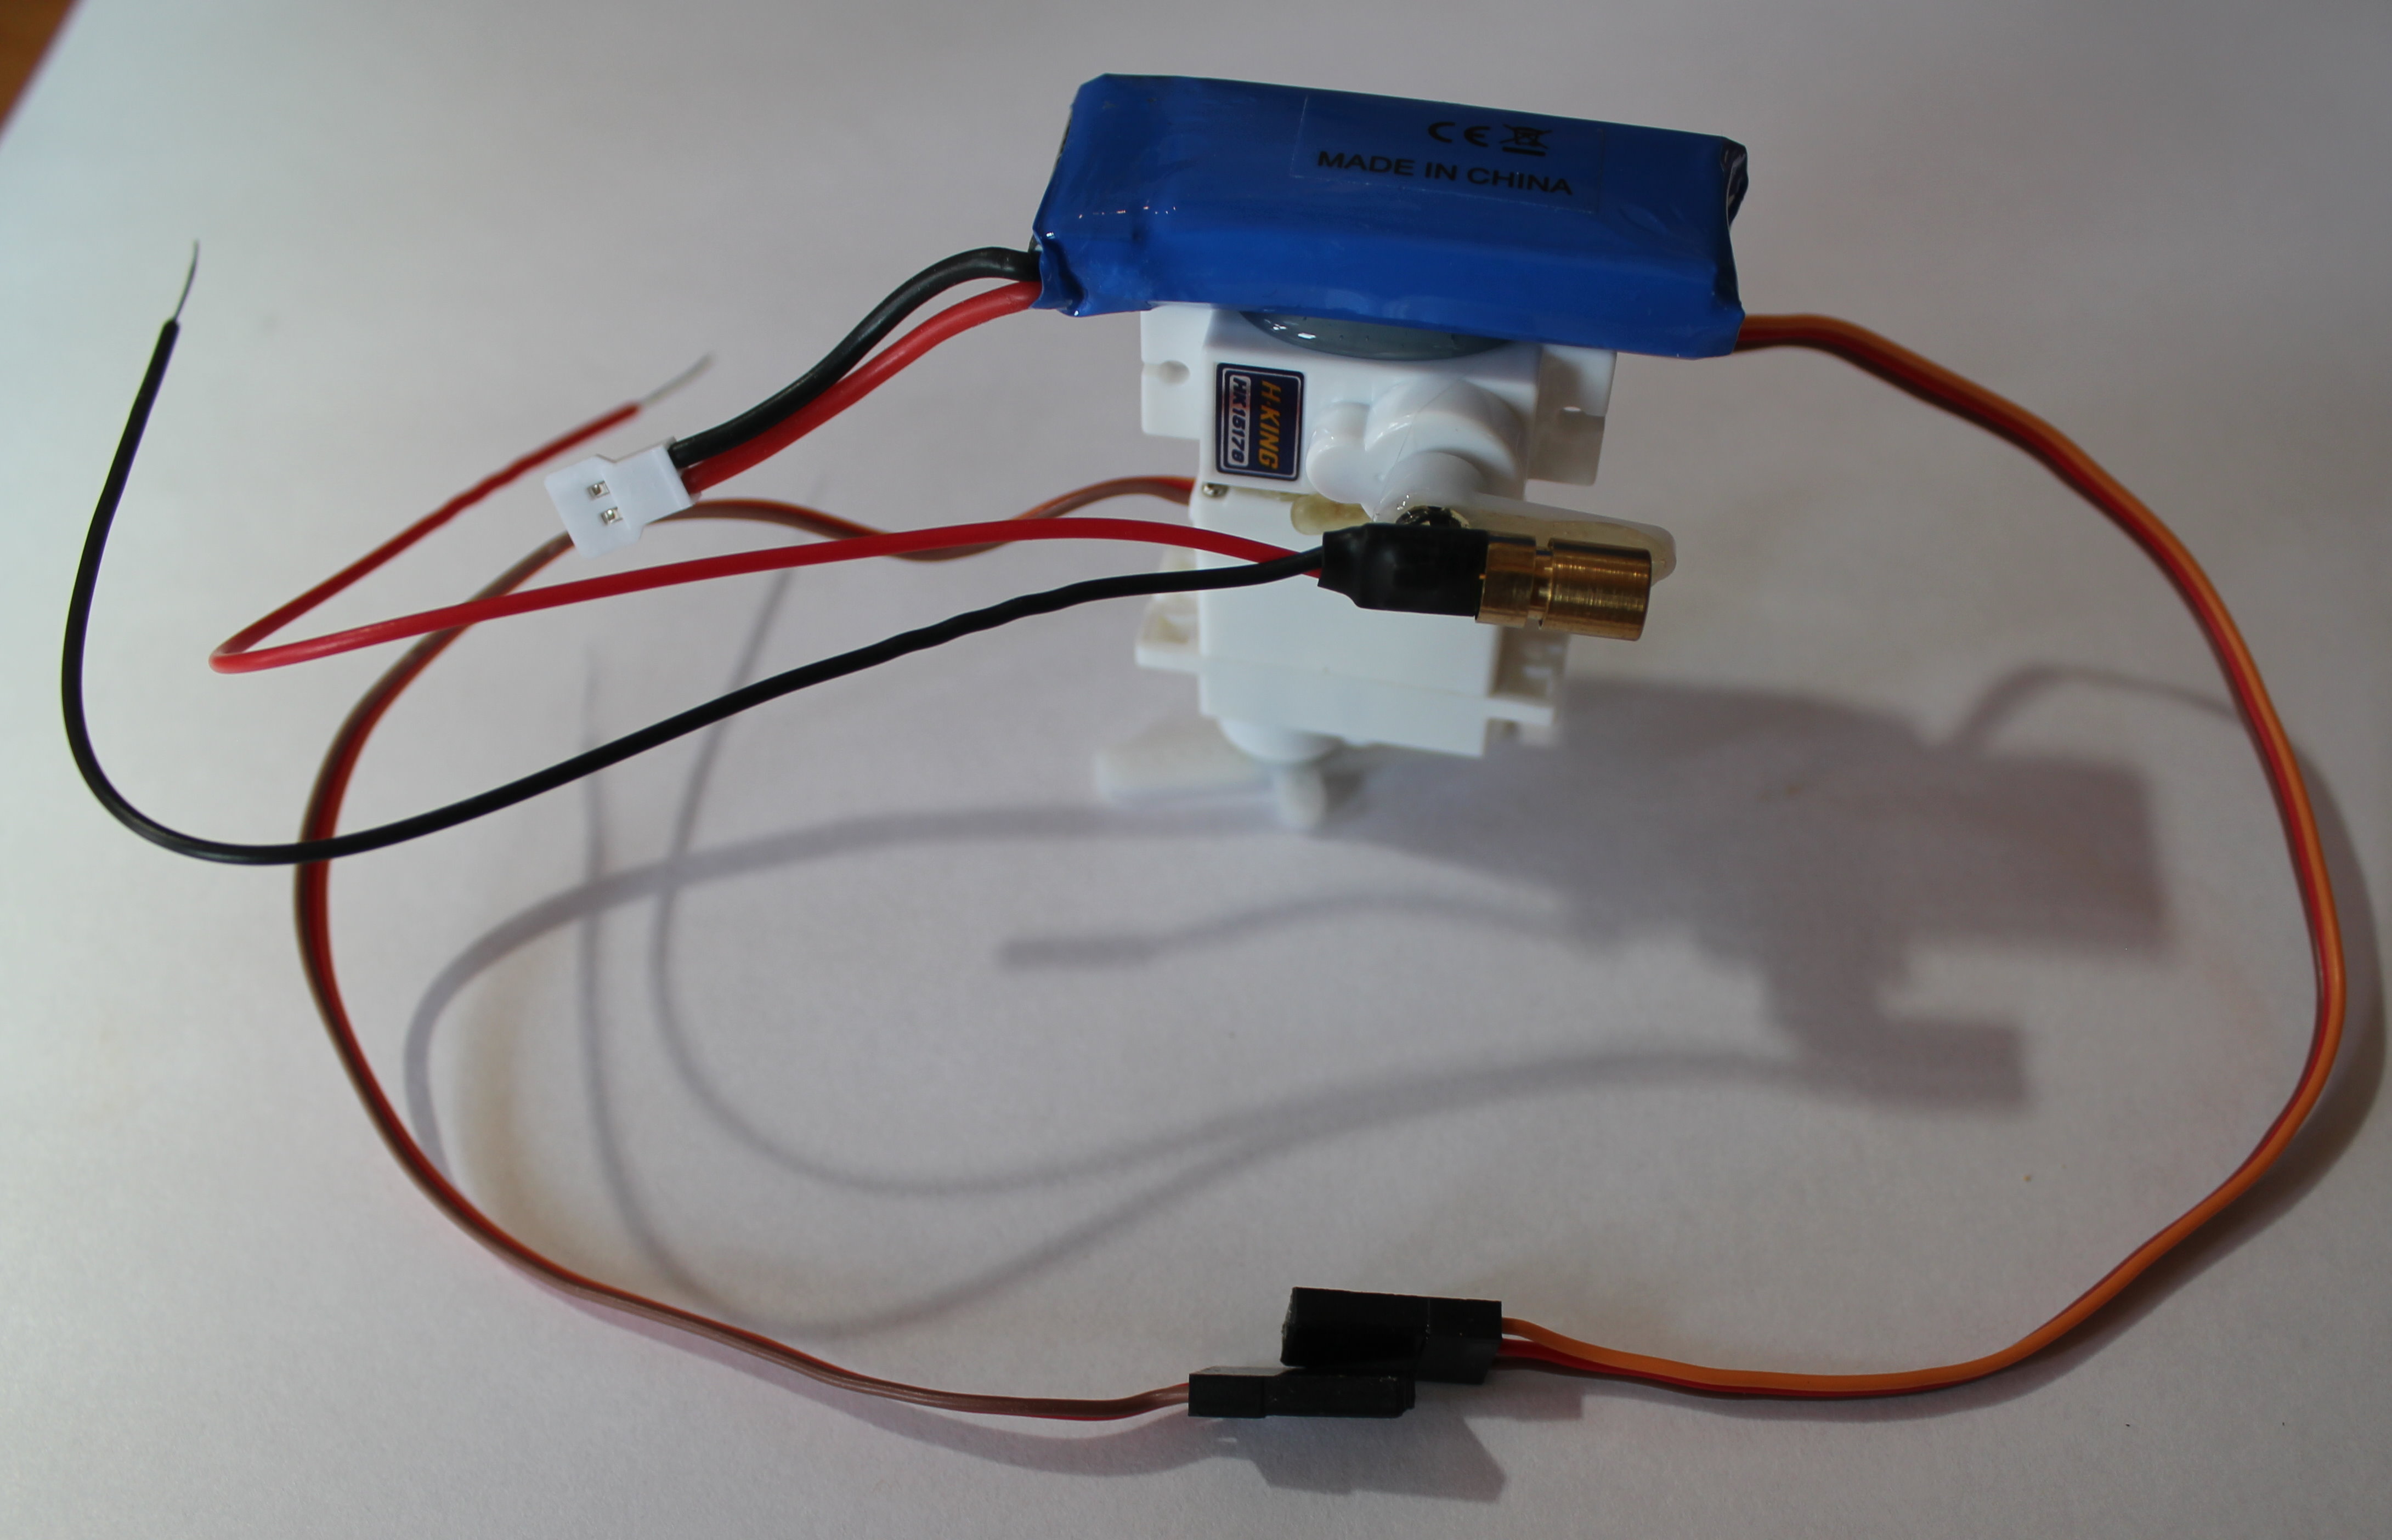
Next, we glue on the battery and the laser. We use a 500 milliampere-hour lithium polymer rechargeable battery, and a low power red laser.
Next, we solder some wires to the Arduino Pro Mini (you can use a Nano if you like). We need two 22 gauge insulated wires soldered to the ground pin of the Arduino, to power the servos. We need another two of the same type of wire soldered to the VCC (power) pin of the Arduino, again to power the servos. We solder the black wire of a battery connector to the ground of the Arduino. We solder the red wire of the battery connector to a switch, and solder a wire from the switch to the VCC pin of the Arduino. This lets us easily turn the power on and off.
We solder the black wire from the laser to the ground pin of the Arduino. We solder the red wire of the laser to pin 4 of the Arduino. This will power the laser. The laser we're using has a built-in resistor so it can be powered from 5 volts. We will be using 3.7 volts, but the laser will still make a nice bright dot on the floor.
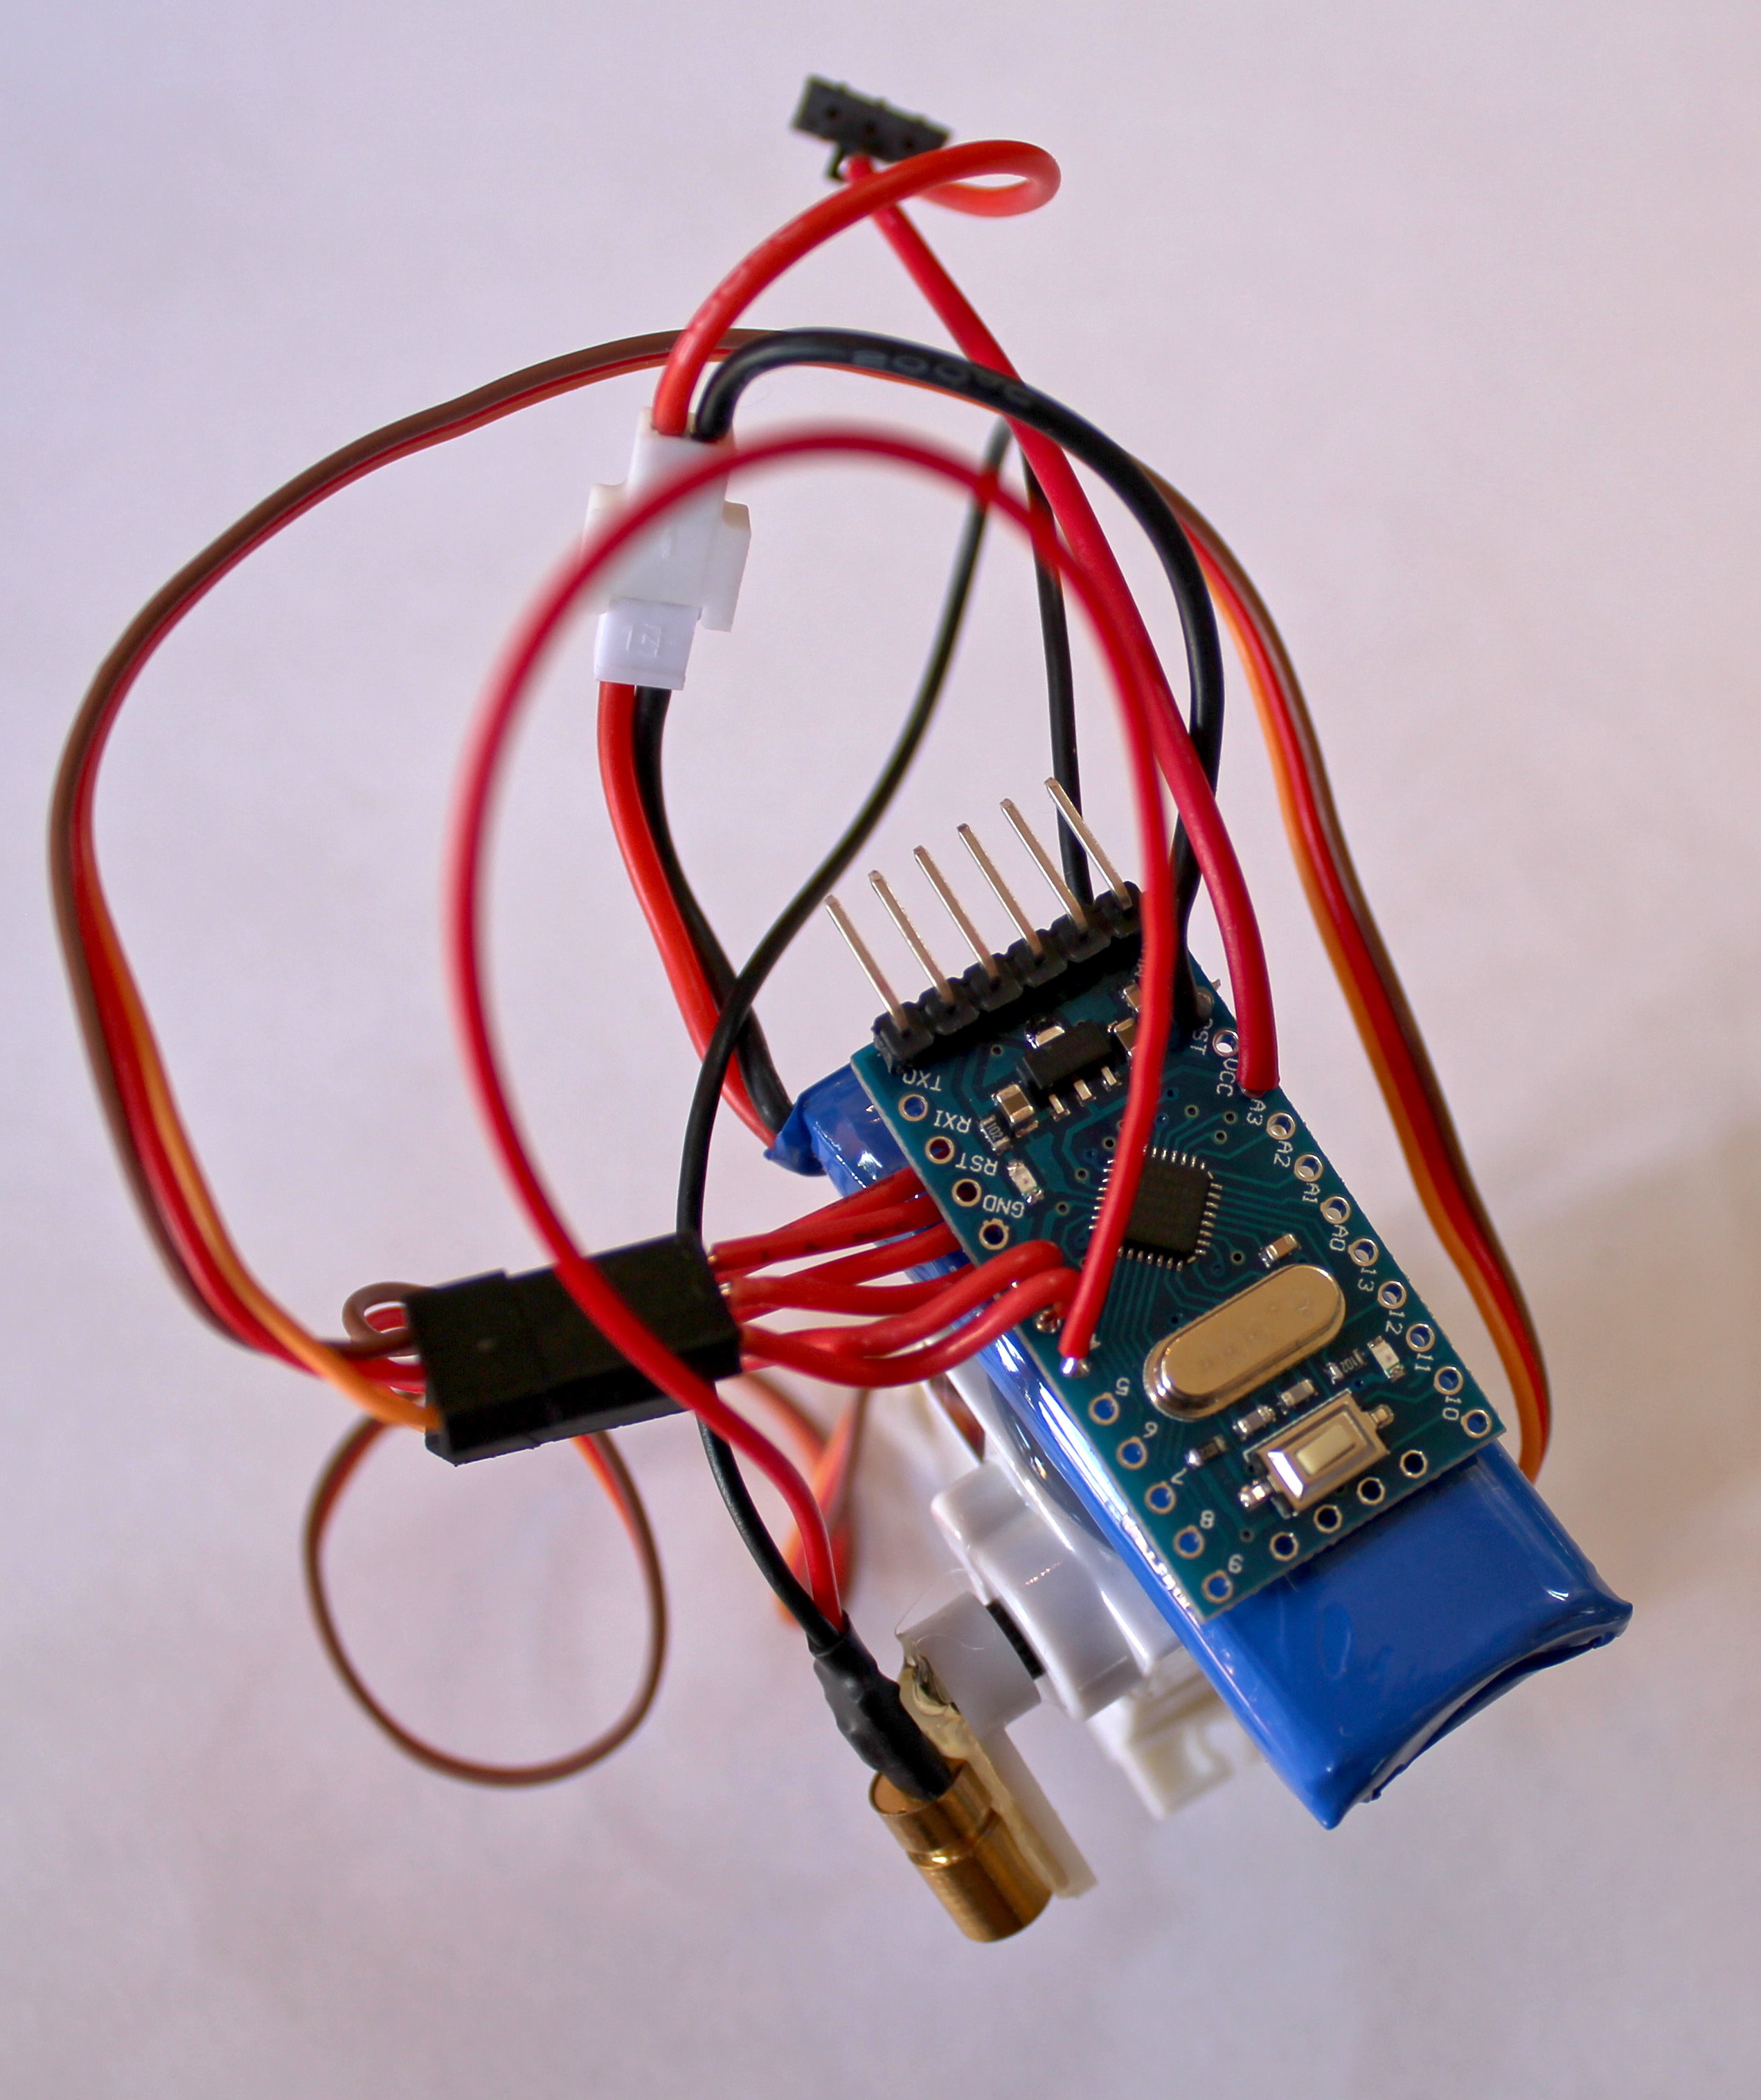
We solder two last 22 gauge solid copper wires to pins 2 and 3 of the Arduino. These will control the servos.
We then glue to Arduino to the battery, and the remaining servo foot to the lid of a large Mason jar, which will act as a sturdy platform. You can fill the jar with rocks, sand, or marbles if you want an even sturdier base.
We happened across a huge plastic Easter egg at a local store, and it was just perfect for protecting the laser toy from inquisitive cats and dogs. The jar and servos fit perfectly, and the laser had no trouble shining through the translucent plastic.
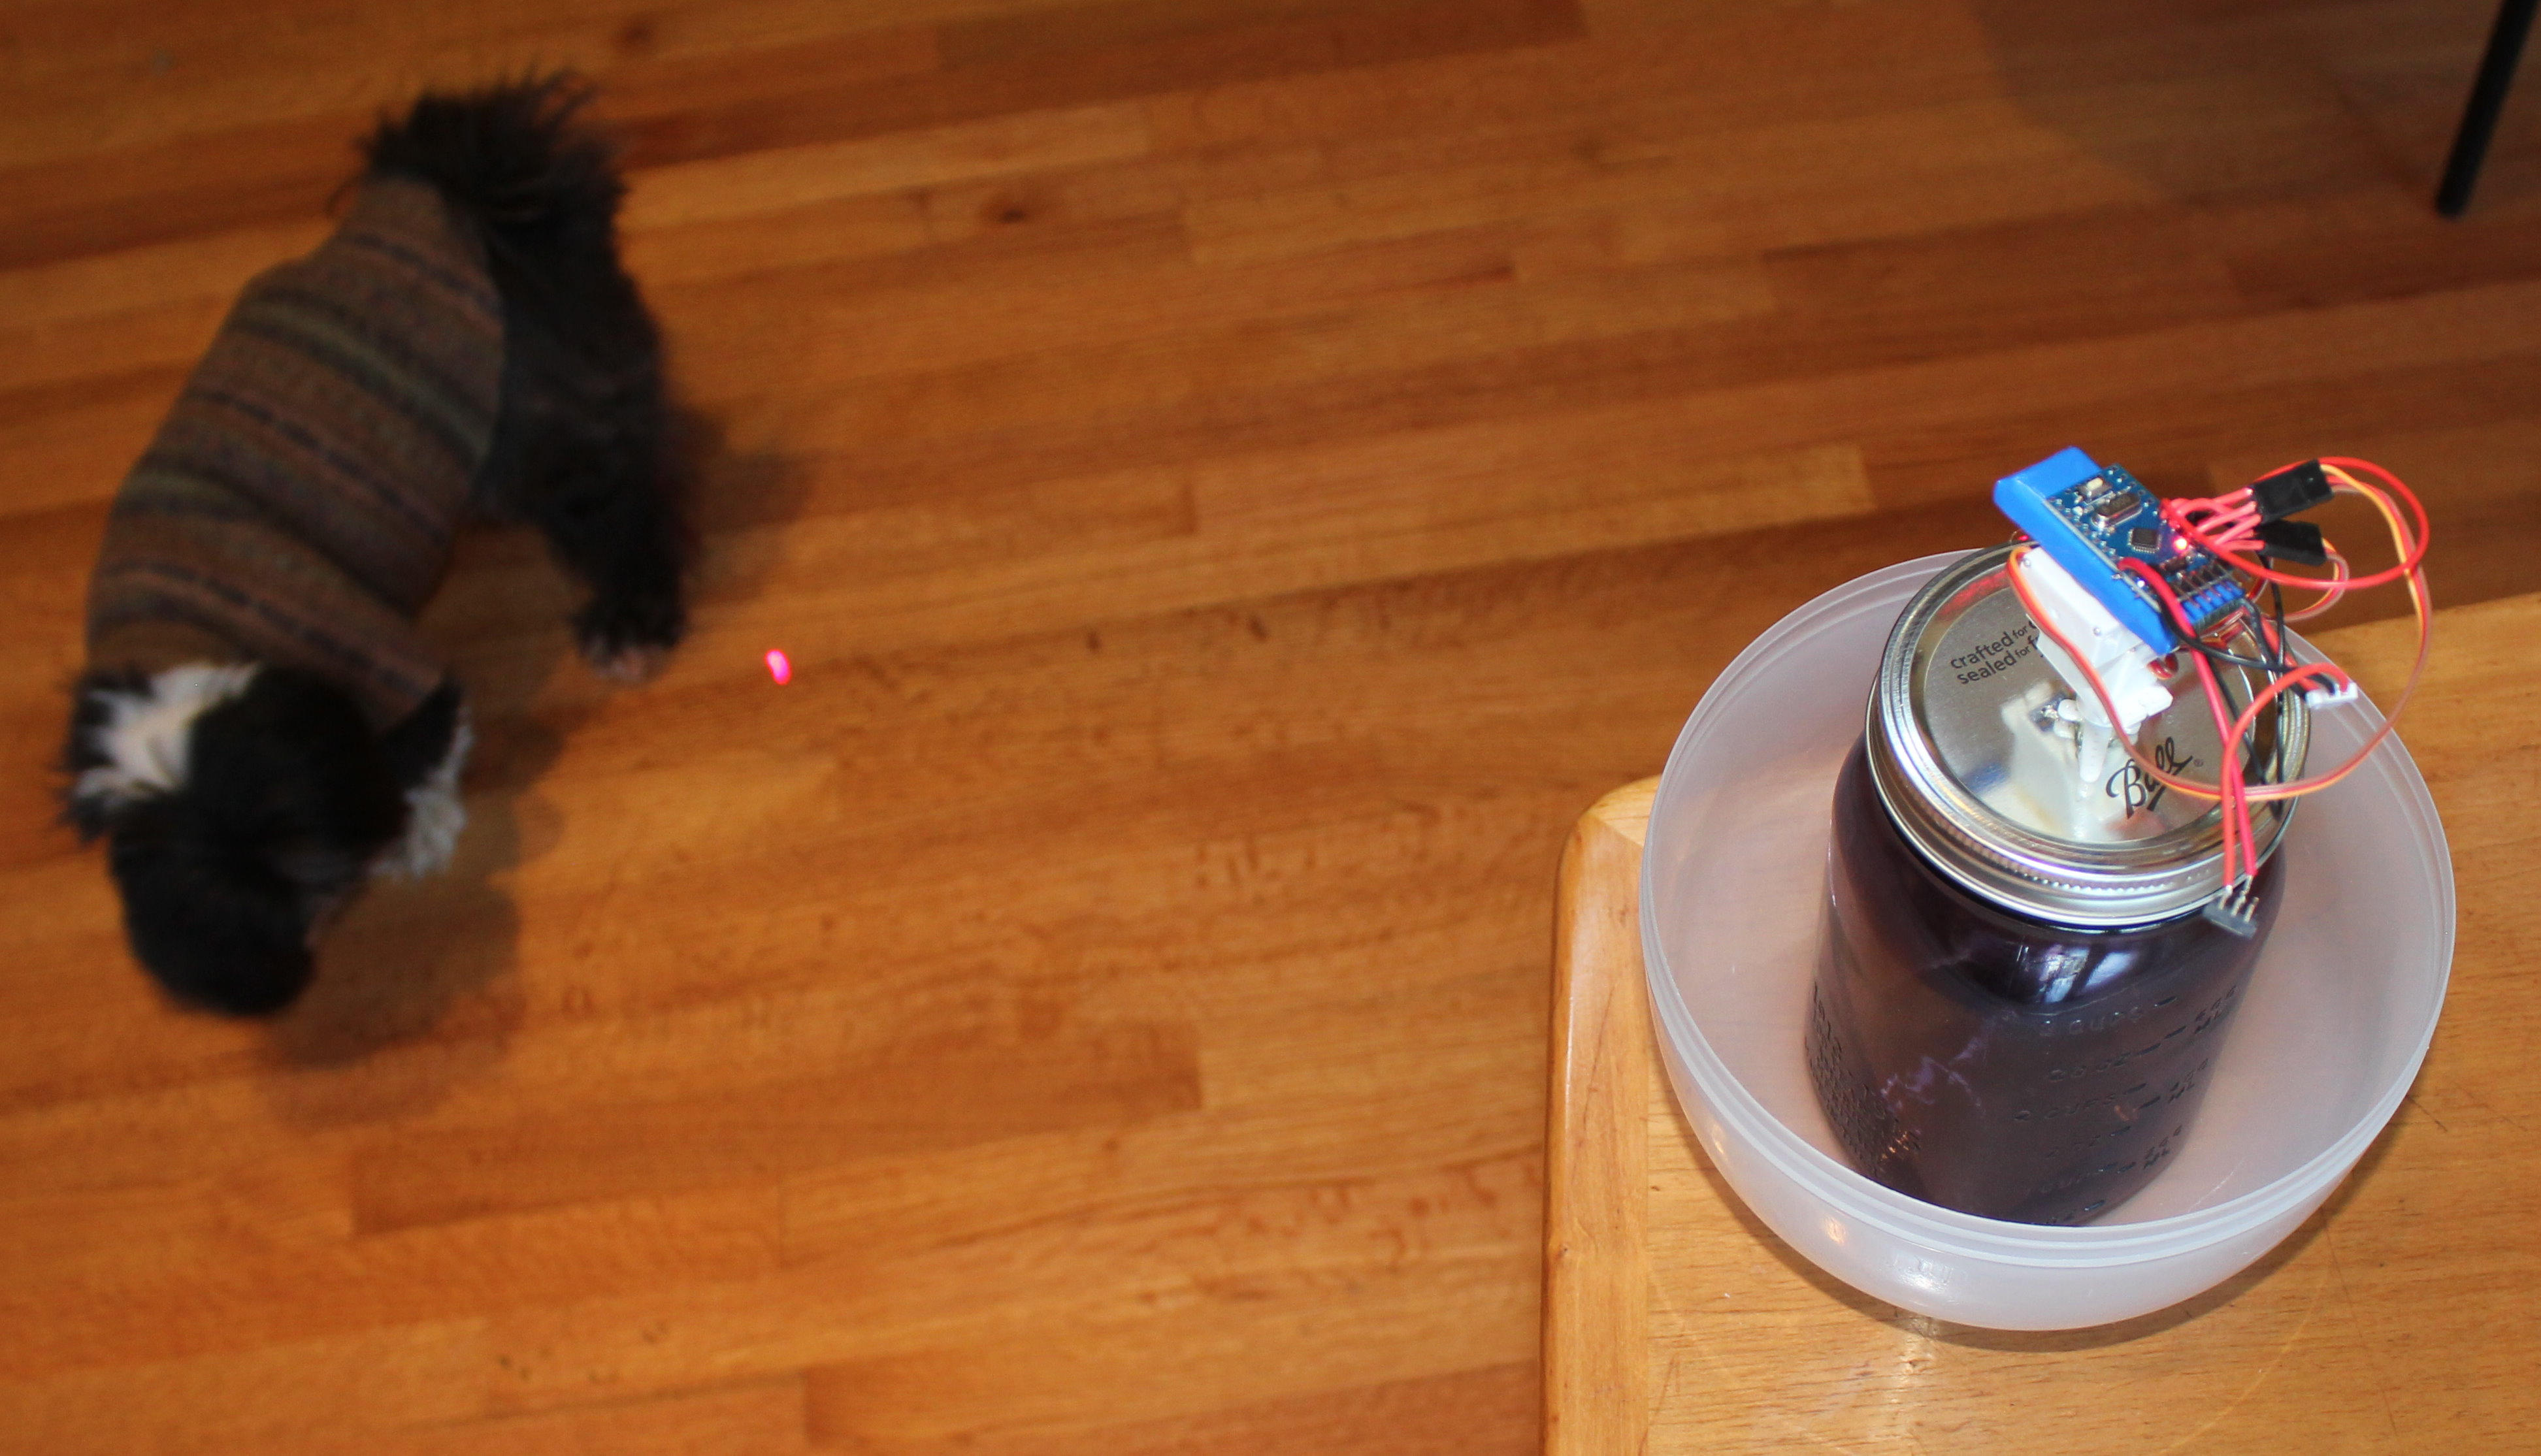
Above, you can see the jar and the finished assembly sitting in the base of the Easter egg. In the video, we have put the top of the egg in place.
The code for the toy is fairly simple:
# include <Arduino.h>
# include <Servo.h>
Servo x_servo, y_servo;
int x, y;
enum
{
LEFTRIGHT=2,
UPDOWN=3,
LASER=4,
MAX_LEFTRIGHT=90, // For smaller rooms, make these smaller
MIN_LEFTRIGHT=0,
MAX_UPDOWN=60,
MIN_UPDOWN=20
};
void
setup( void )
{
x_servo.attach( LEFTRIGHT );
y_servo.attach( UPDOWN );
pinMode( LASER, OUTPUT );
digitalWrite( LASER, HIGH );
x = random( 90 );
y = random( 90 );
}
void
loop( void )
{
//
// Every once in a while we stop to let the cat catch it.
// Then we hide the light, so when the cat looks, it's gone.
// Then we start back up again.
//
if( random( 200 ) == 1 )
{
delay( 1000 );
digitalWrite( LASER, LOW );
delay( 3000 );
digitalWrite( LASER, HIGH );
}
int new_x = random( MAX_LEFTRIGHT - MIN_LEFTRIGHT ) + MIN_LEFTRIGHT;
int new_y = random( MAX_UPDOWN - MIN_UPDOWN ) + MIN_UPDOWN;
int step_x = new_x > x ? 1 : -1;
int step_y = new_y > y ? 1 : -1;
while( x != new_x && y != new_y )
{
if( x != new_x )
x_servo.write( x );
if( y != new_y )
y_servo.write( y );
x += step_x;
y += step_y;
delay( 50 );
}
}
We use the Arduino Servo library to control the servos. In setup(), we attach the servos to their respective pins, enable and turn on the laser, and select random values for the first x and y positions.
In the loop() routine, we play a trick on the cat. Every 200 times through the loop, we stop the laser, so the cat can pounce on it. Then we turn the laser off, so the cat looks under his paws to see what he has caught. But there's nothing there! After another three seconds, the laser turns back on, and the chase continues.
We pick a new random x and y location. We have constants that define how far left and right the laser will move, and how far up and down. This allows the programmer to adjust the laser movements to accommodate smaller or larger rooms.
We don't just suddenly move the laser dot to its new position. That would be much too fast, and noisy, and it would shake the wires loose. Instead, we incrementally move the laser one step closer, and then wait 50 milliseconds before moving the next step. When we finally have reached the desired location, we exit the loop() routine, and start over with a new location.